
My Team
Invite colleagues to your firm and manage the team table with views, filters, and columns.
My Team lists everyone at your firm and is where you add colleagues. The table it uses (saved views, filters, and column controls) is the same one that appears elsewhere in the partner portal, so what you learn here applies throughout.
The Team Page
Open My Team from the sidebar, or select Invite your team members on the dashboard.
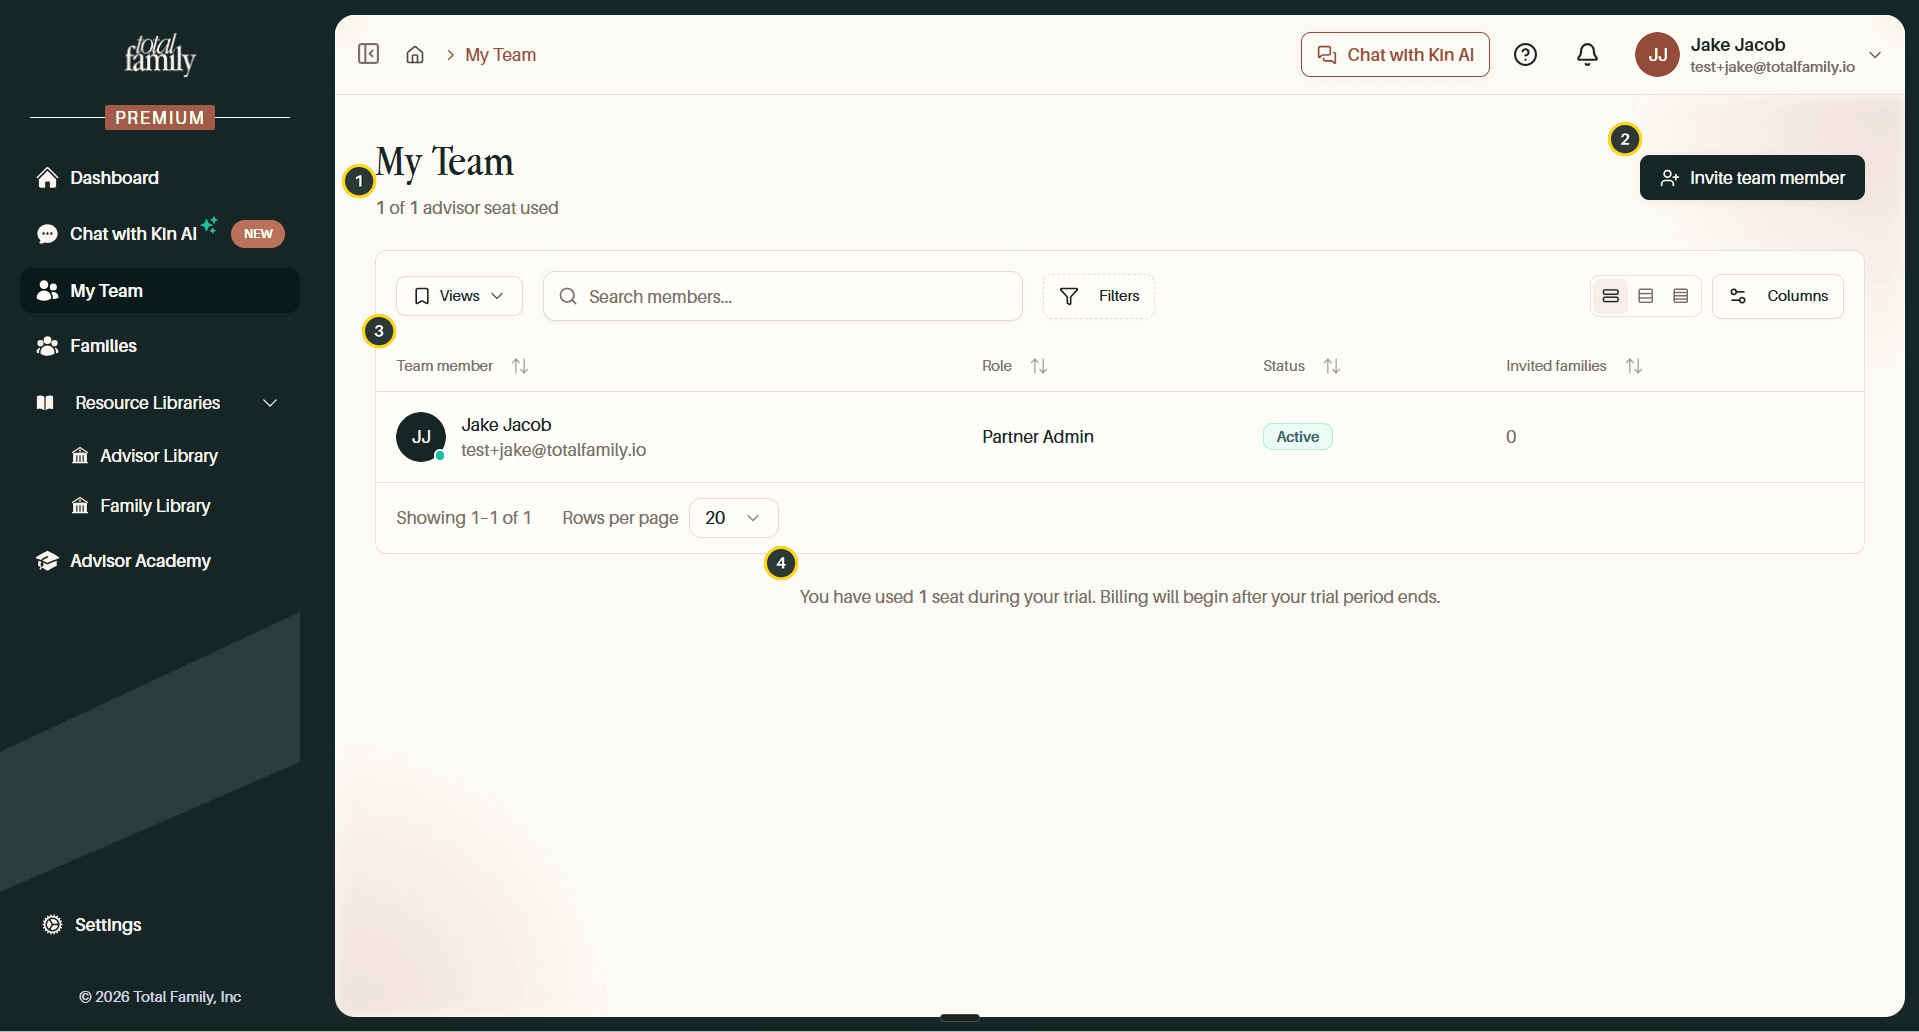
- Seat usage: how many advisor seats you are using out of those you hold.
- Invite team member: adds a colleague.
- The team table: every member, with role, status, how many families each has invited, and how far each one has got through Advisor Activation and Family Activation on the Firm Roadmap.
- Billing note: confirms that seats used during the trial are billed only after it ends.
Invite a Team Member
The whole thing takes one form and one confirmation.
Selecting Invite team member opens a short form.
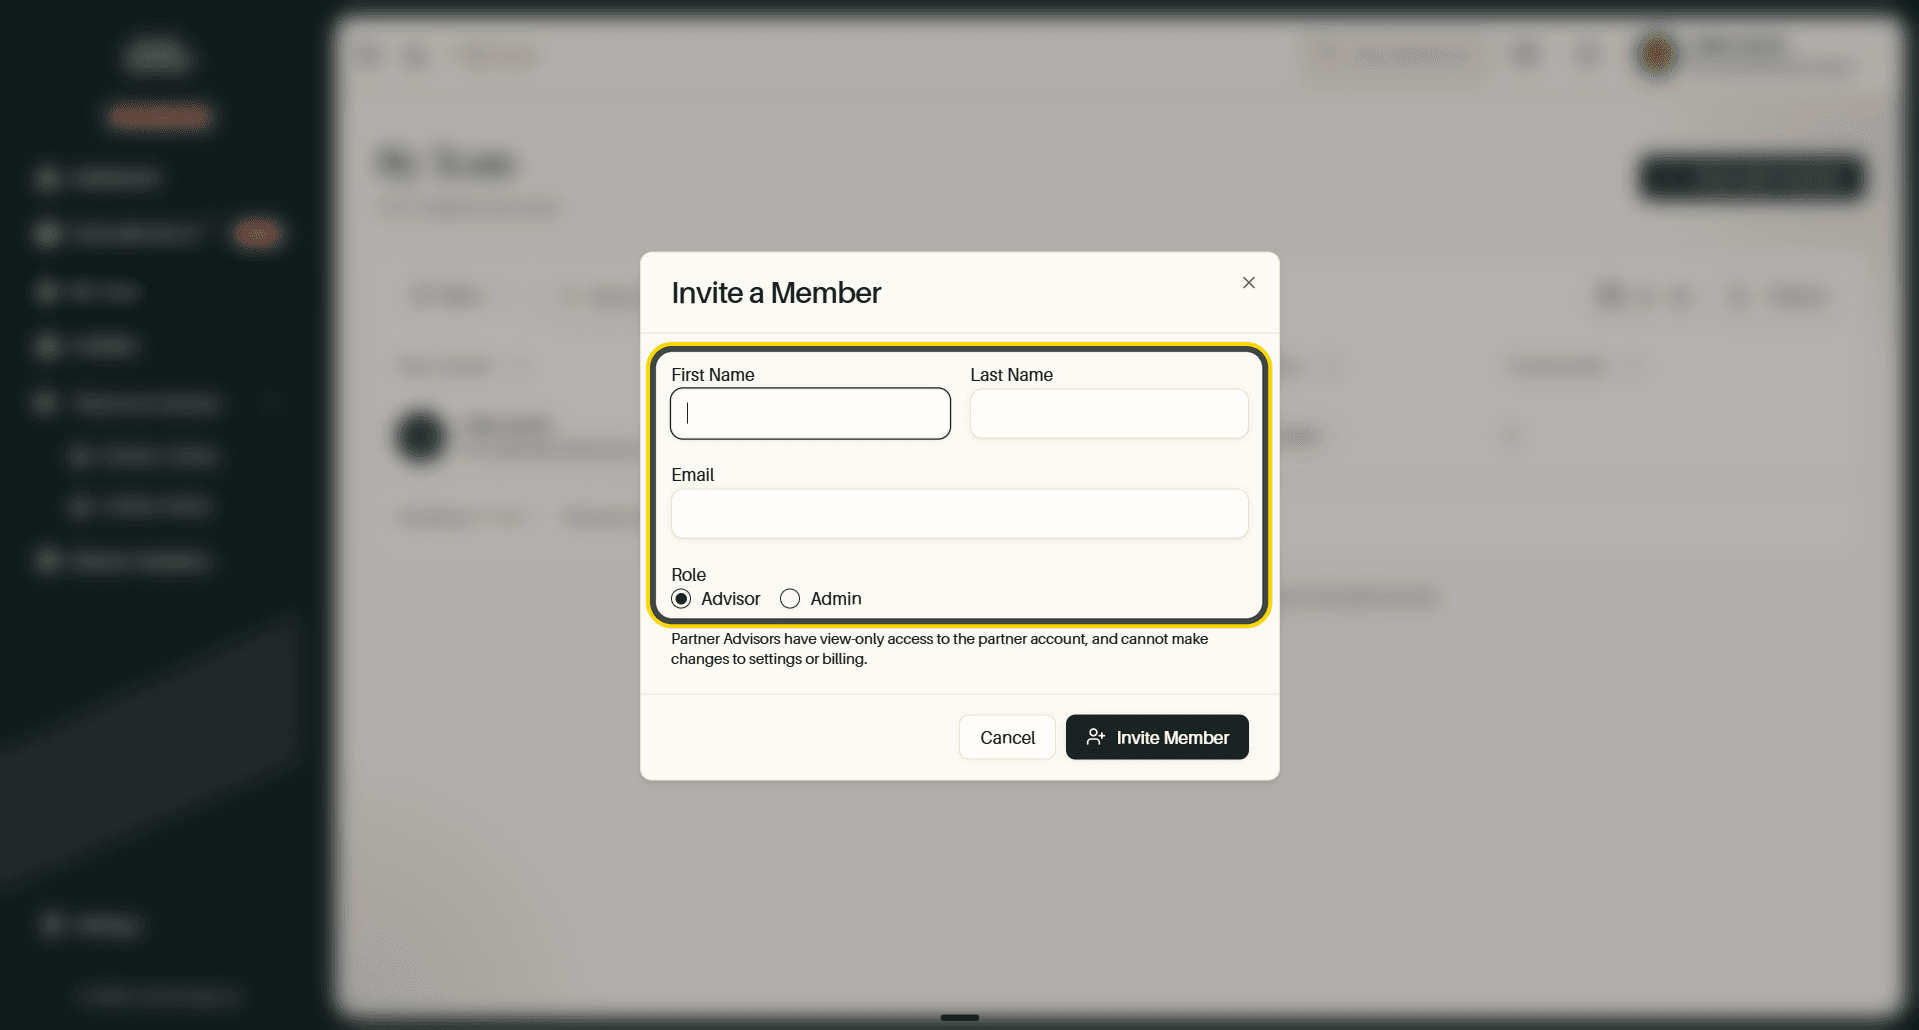
Fill in their First Name, Last Name, and Email, then choose a Role.
Note The two roles differ in what they can change, not just in name. Partner Advisors have view-only access to the partner account and cannot alter settings or billing. Admins can. The dialog states this under the role options.
With the details in, select Invite Member.
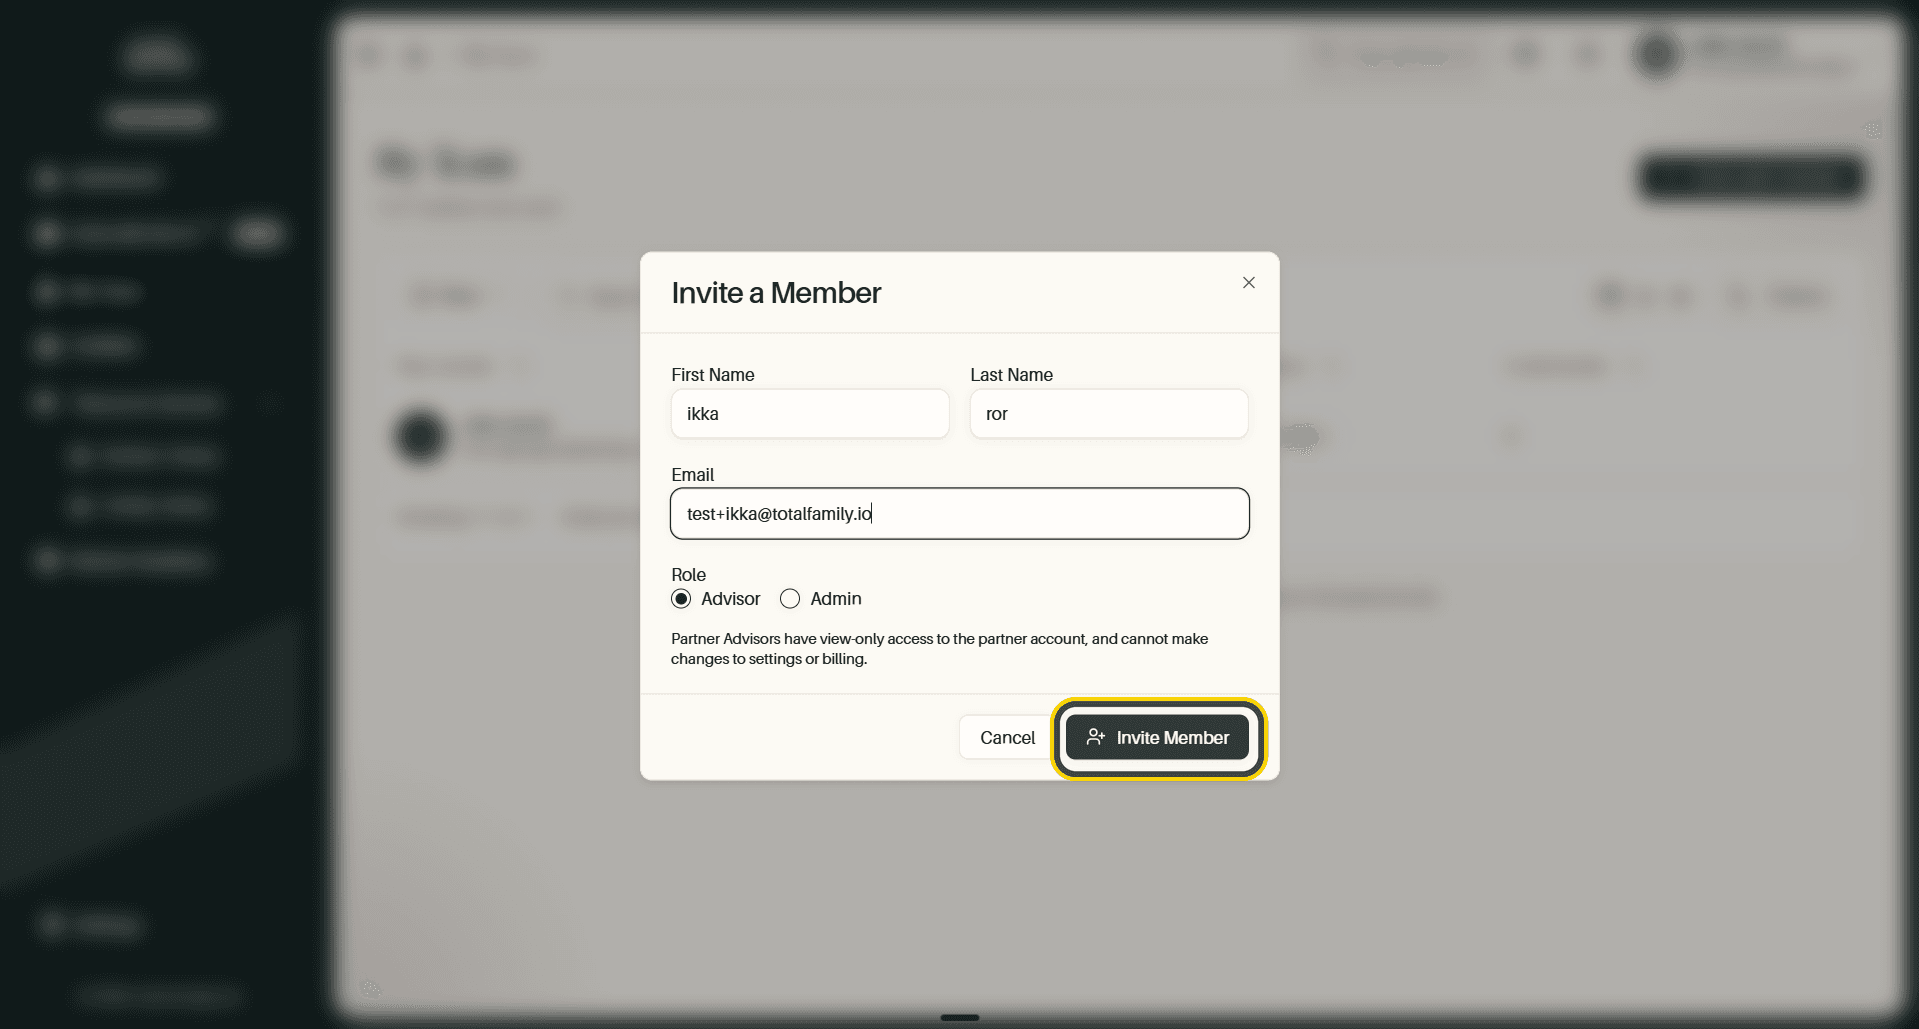
Confirm and Send
Nothing is sent until you confirm. Invite Team Member? names the address the invitation is going to, so it is worth reading that line rather than clicking through it. A mistyped address is easier to catch here than after it has gone.
Select Send Invite. The button moves through Sending invitation… to Invitation sent, and the dialog closes itself.
If the Invitation Adds a Paid Seat
Where adding this colleague changes what you pay, a subscription confirmation appears first.
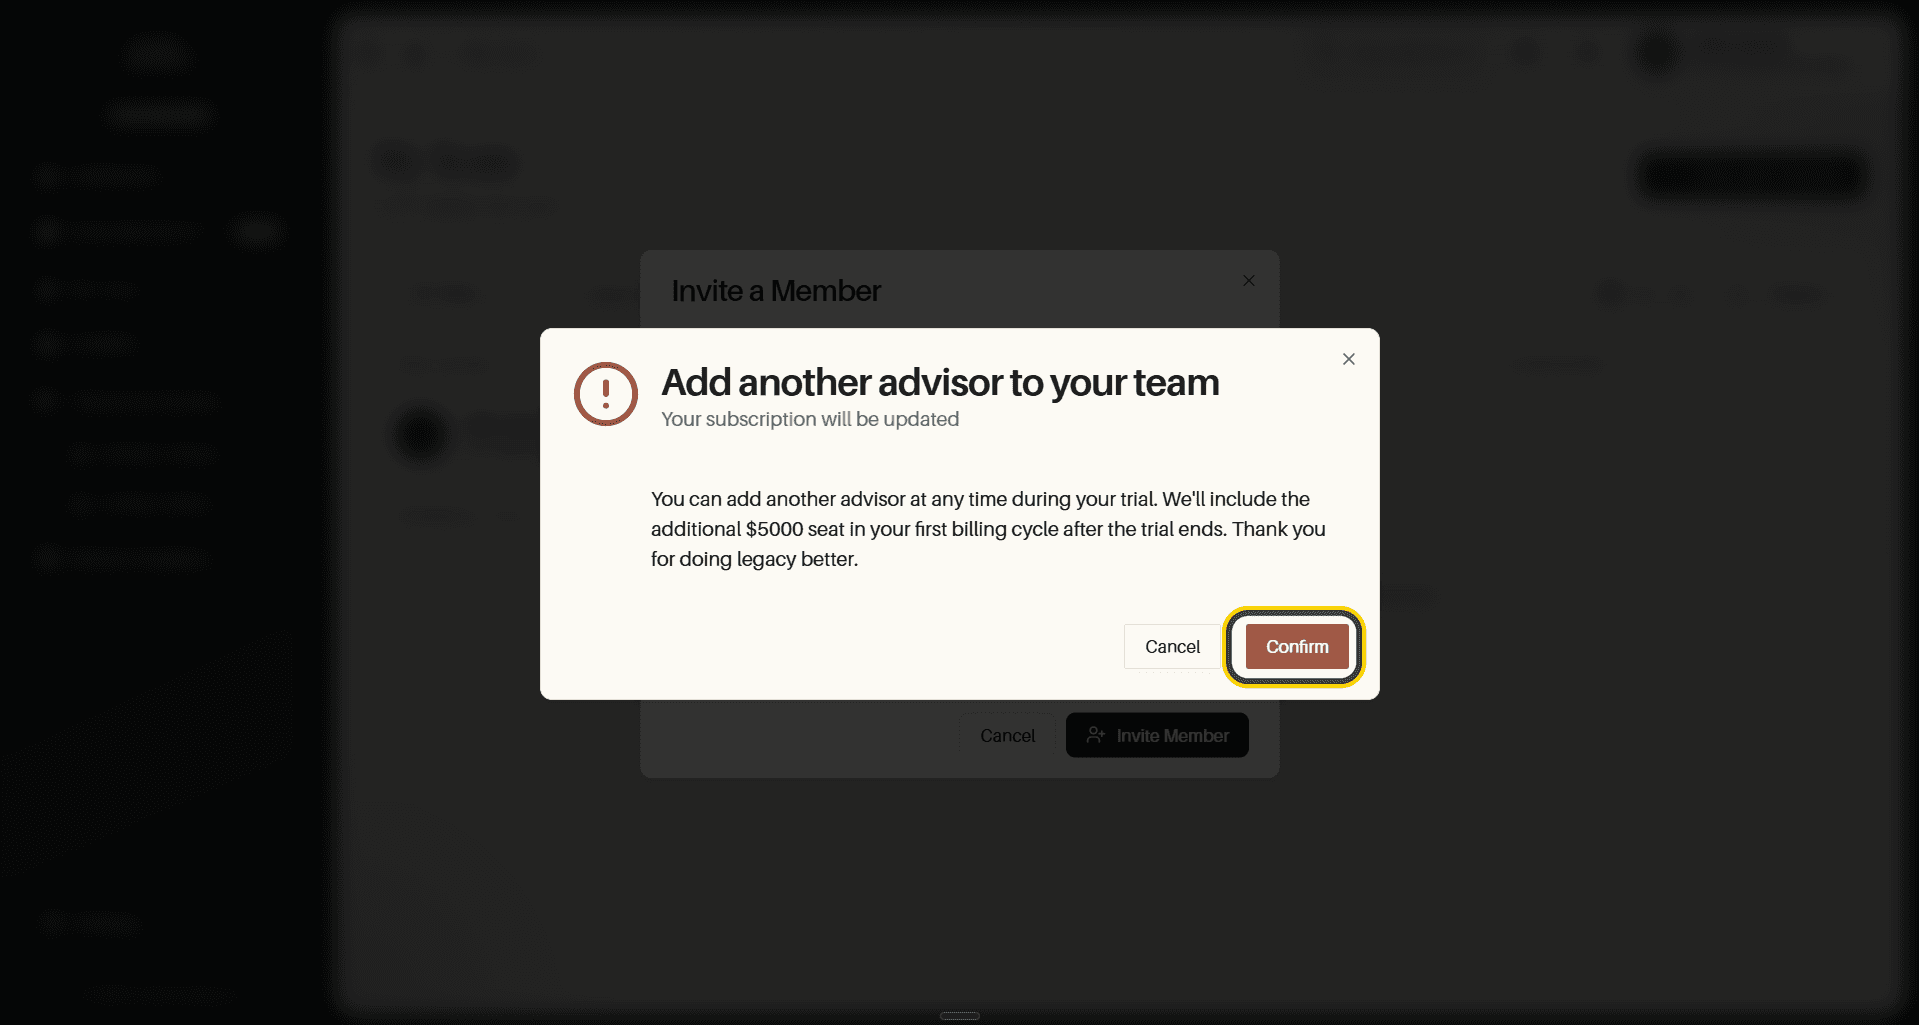
It is explicit about the cost and about the timing: you can add an advisor at any time during the trial, and the additional seat is included in your first billing cycle after the trial ends, not now. Confirm carries on, Cancel backs out.
The Invited Member
Member invited successfully! confirms it, and your colleague is in the table straight away.
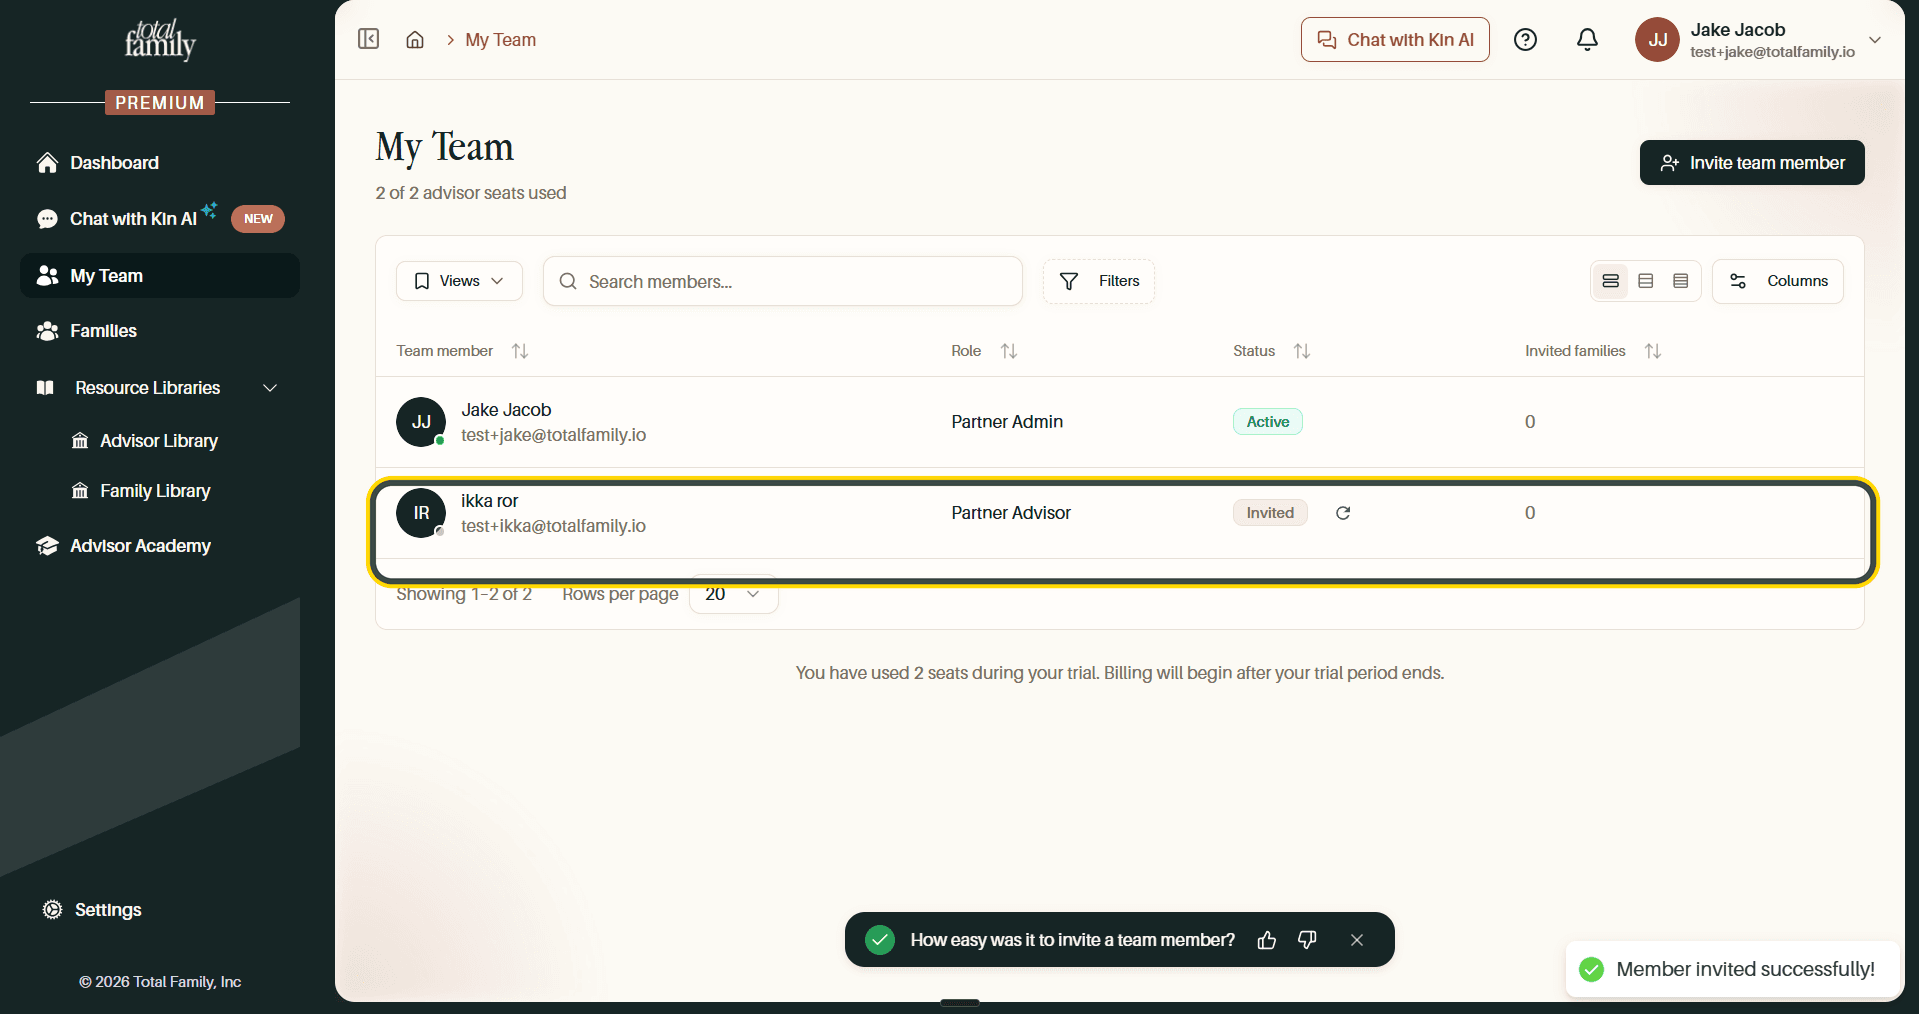
Their status reads Invited until they accept, with a refresh control beside it to resend. Seat usage under the page title updates to match, and the note under the table keeps count of what you have used during the trial.
Saved Views
If you find yourself applying the same filters repeatedly, save them as a view.
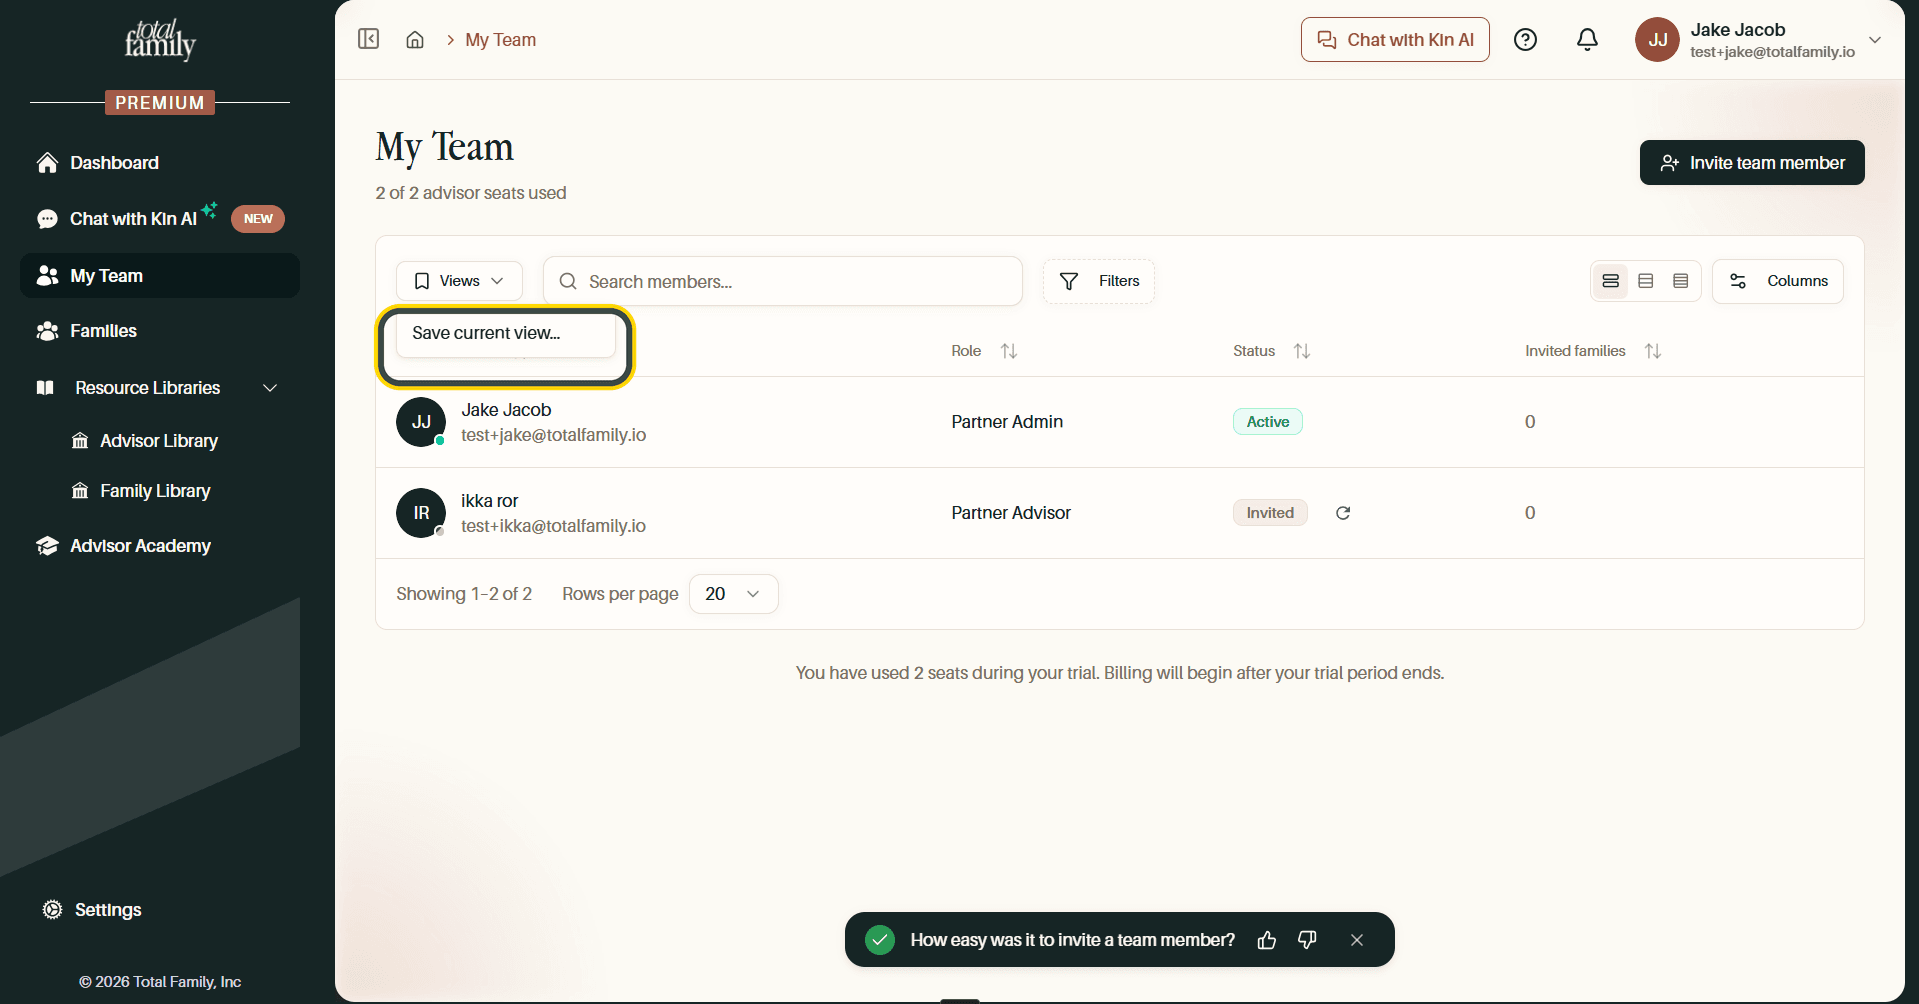
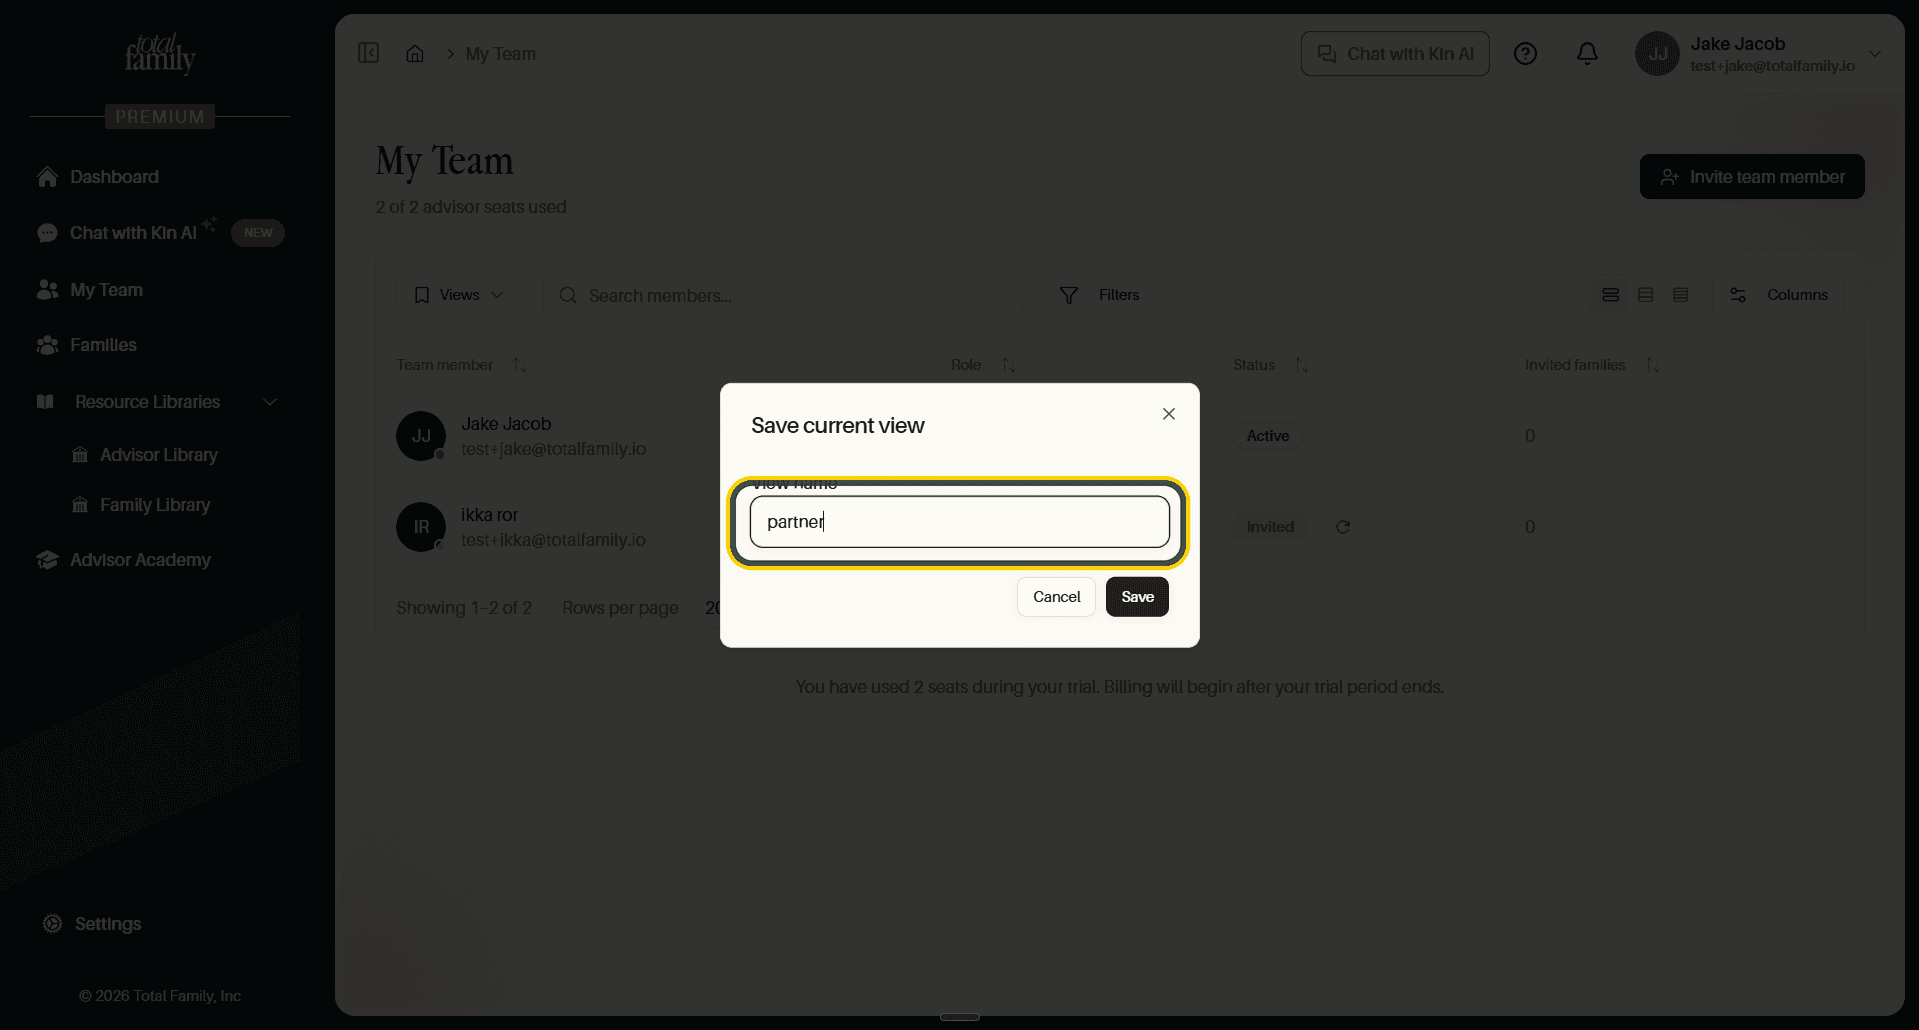
Open Views and select Save current view…, then give it a name.
Saved views appear in the same menu, with a tick beside the one you are using. Manage views… lets you rename or remove them.
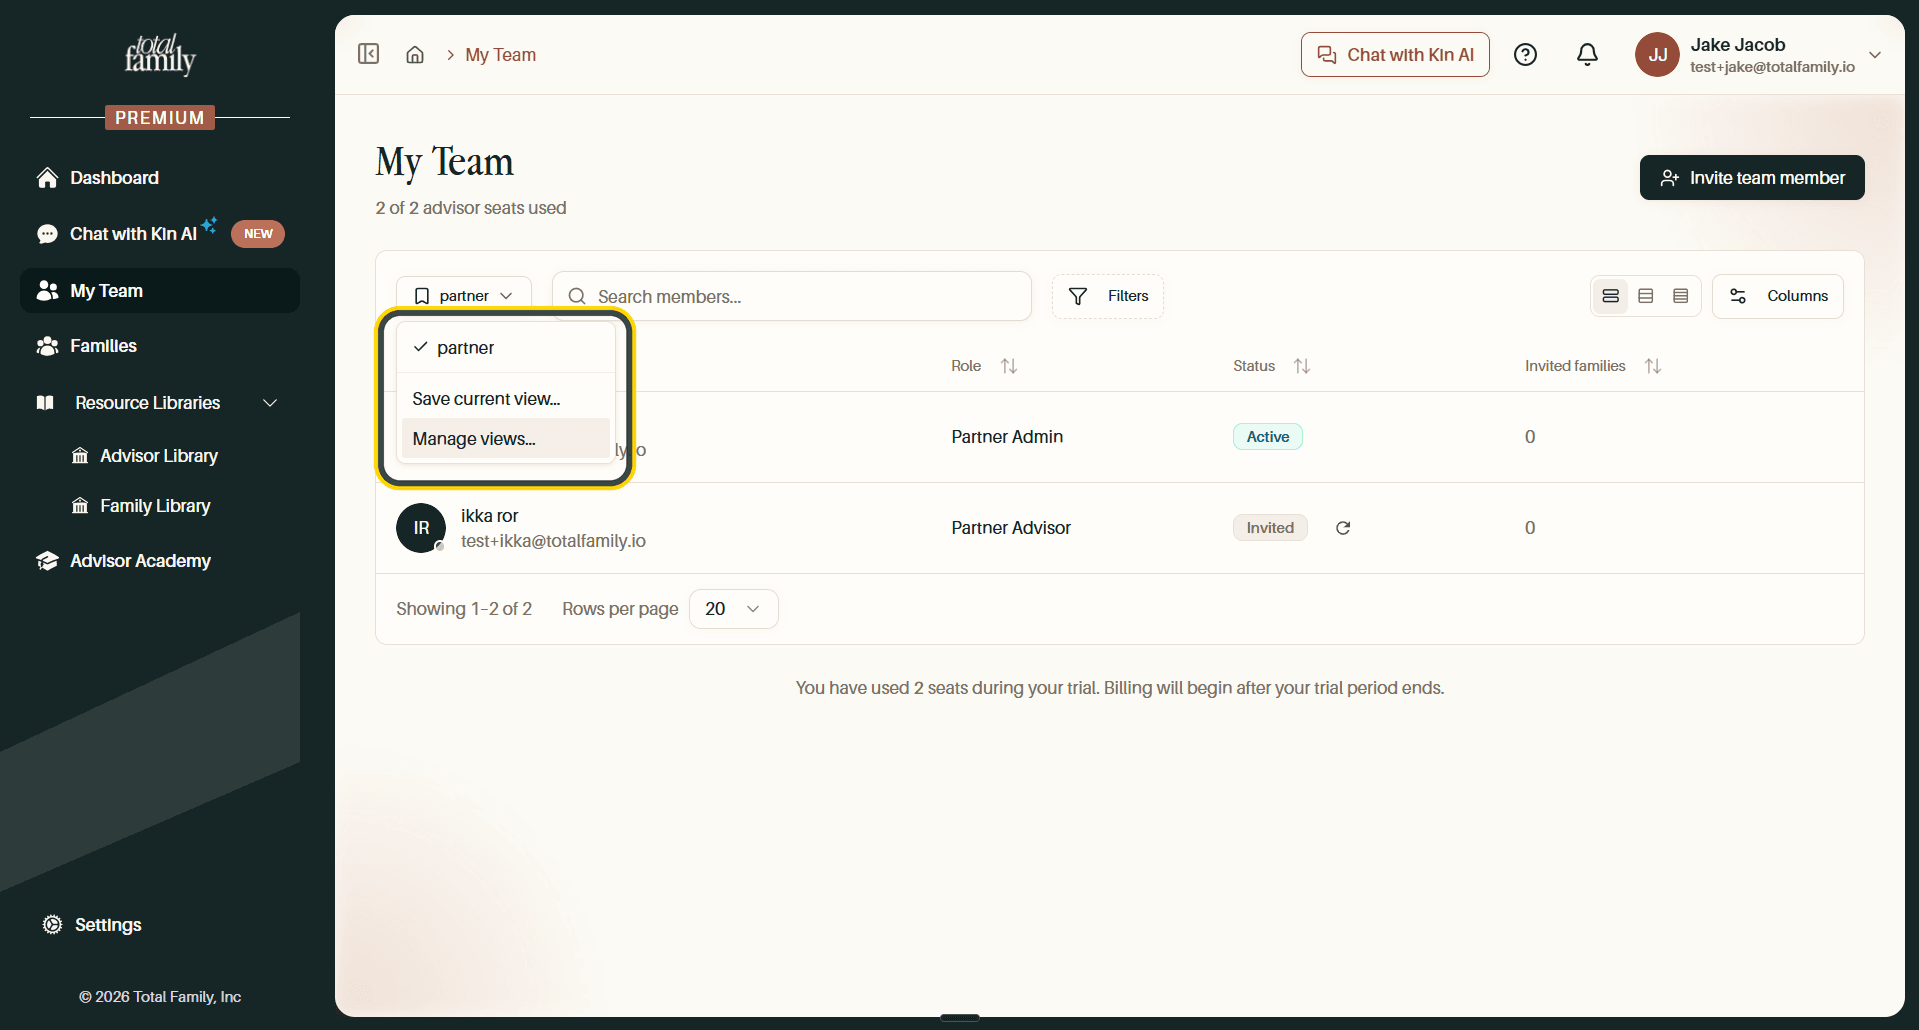
A view captures the filters, columns, and layout you had at the time, so switching views switches all of it at once.
Search and Filters
Search members… matches on name and email. For anything more specific, use Filters.
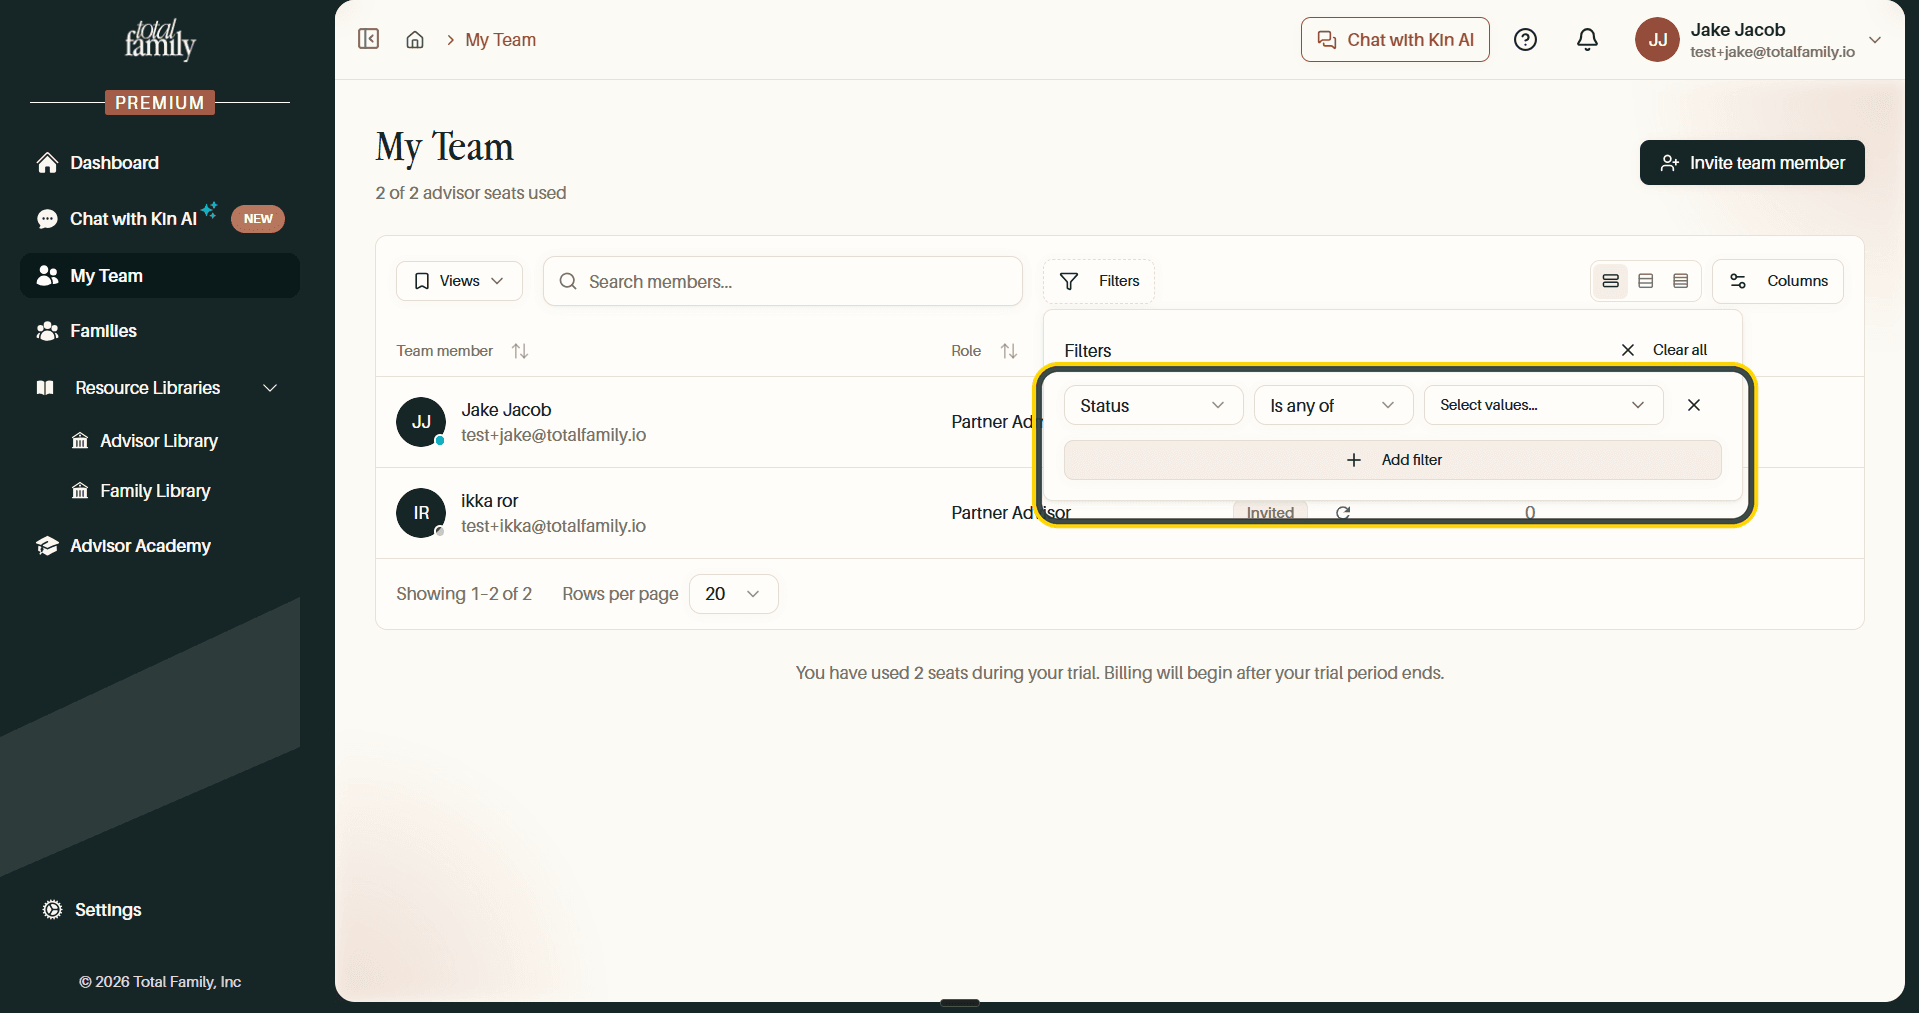
Each filter is built from three parts: a field (Status, Role), a condition (Is any of), and one or more values. Add filter stacks more conditions on top.
Applying a filter changes the table and shows what is active.
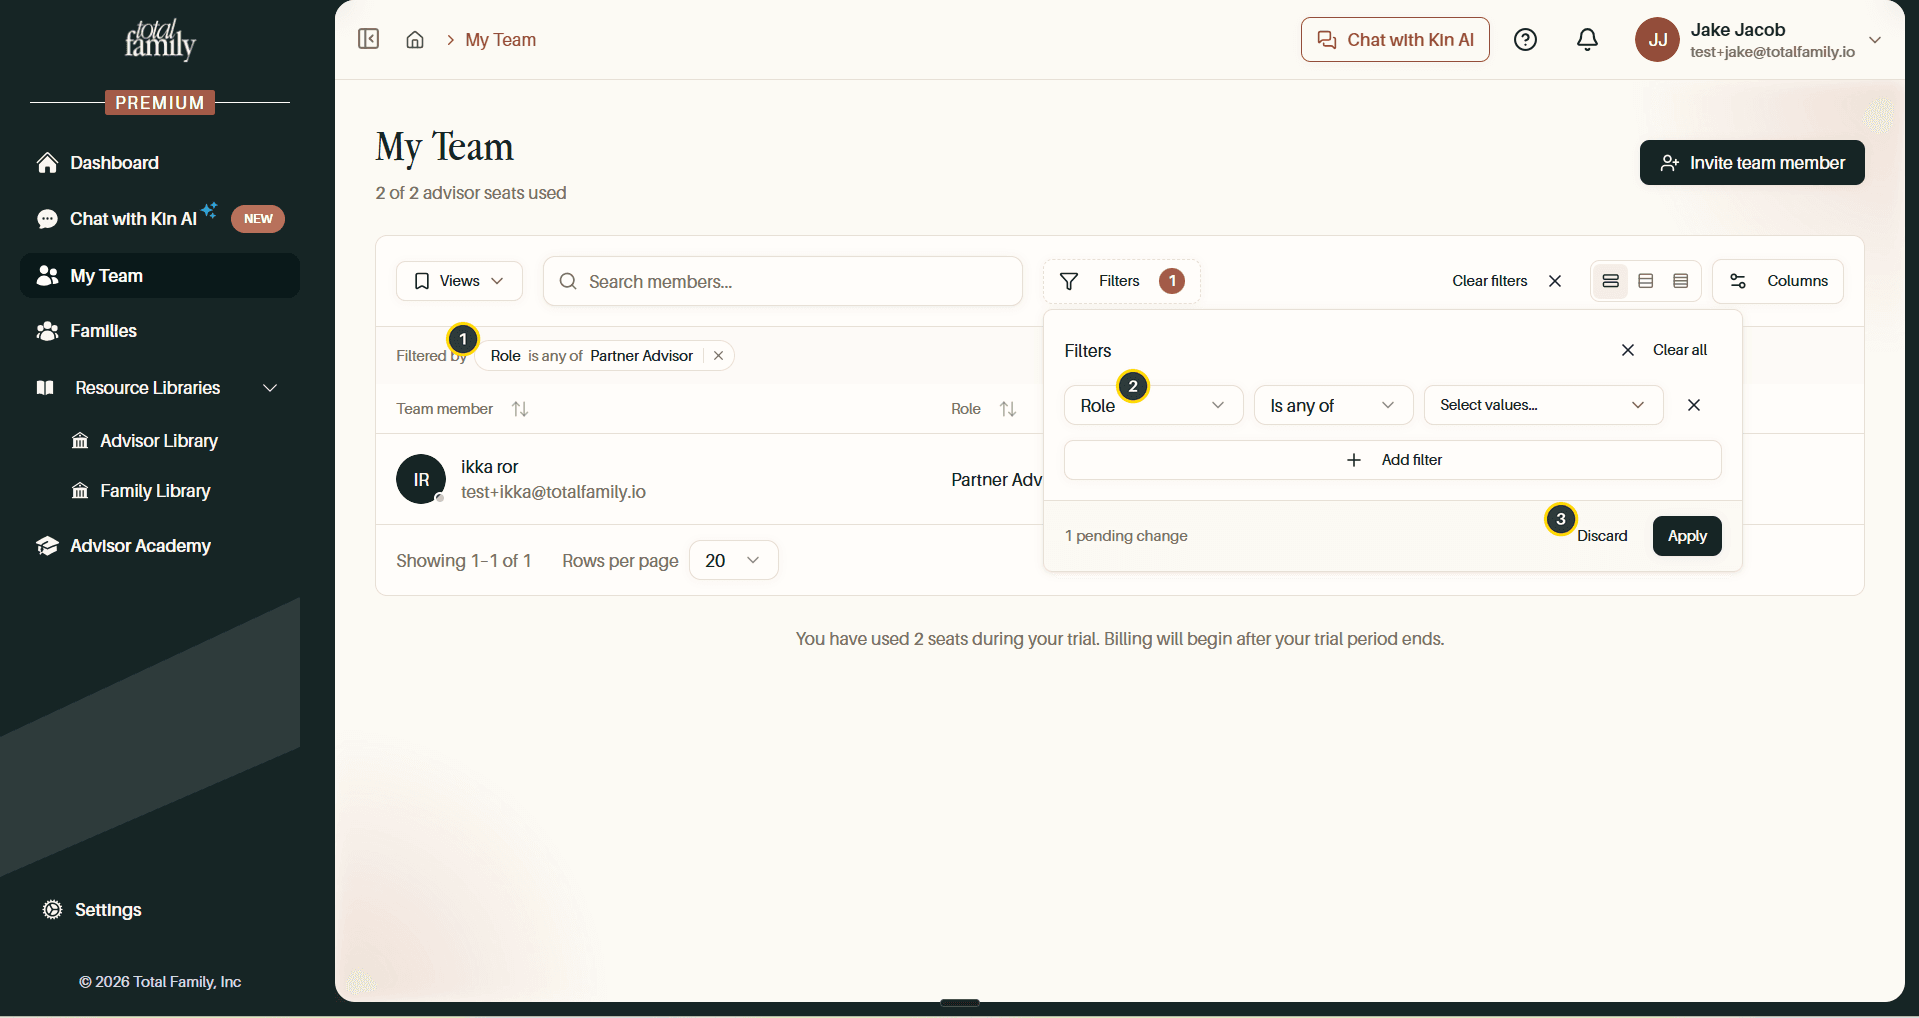
- Filtered by: a chip describing the active filter, with an ✕ to remove it. The Filters button also shows a count.
- The filter being edited: field, condition, and values.
- Apply / Discard: filters are not live until applied. 1 pending change tells you an edit is waiting, and Clear filters at the top right removes everything at once.
Columns and Layout
Columns controls which fields the table shows.
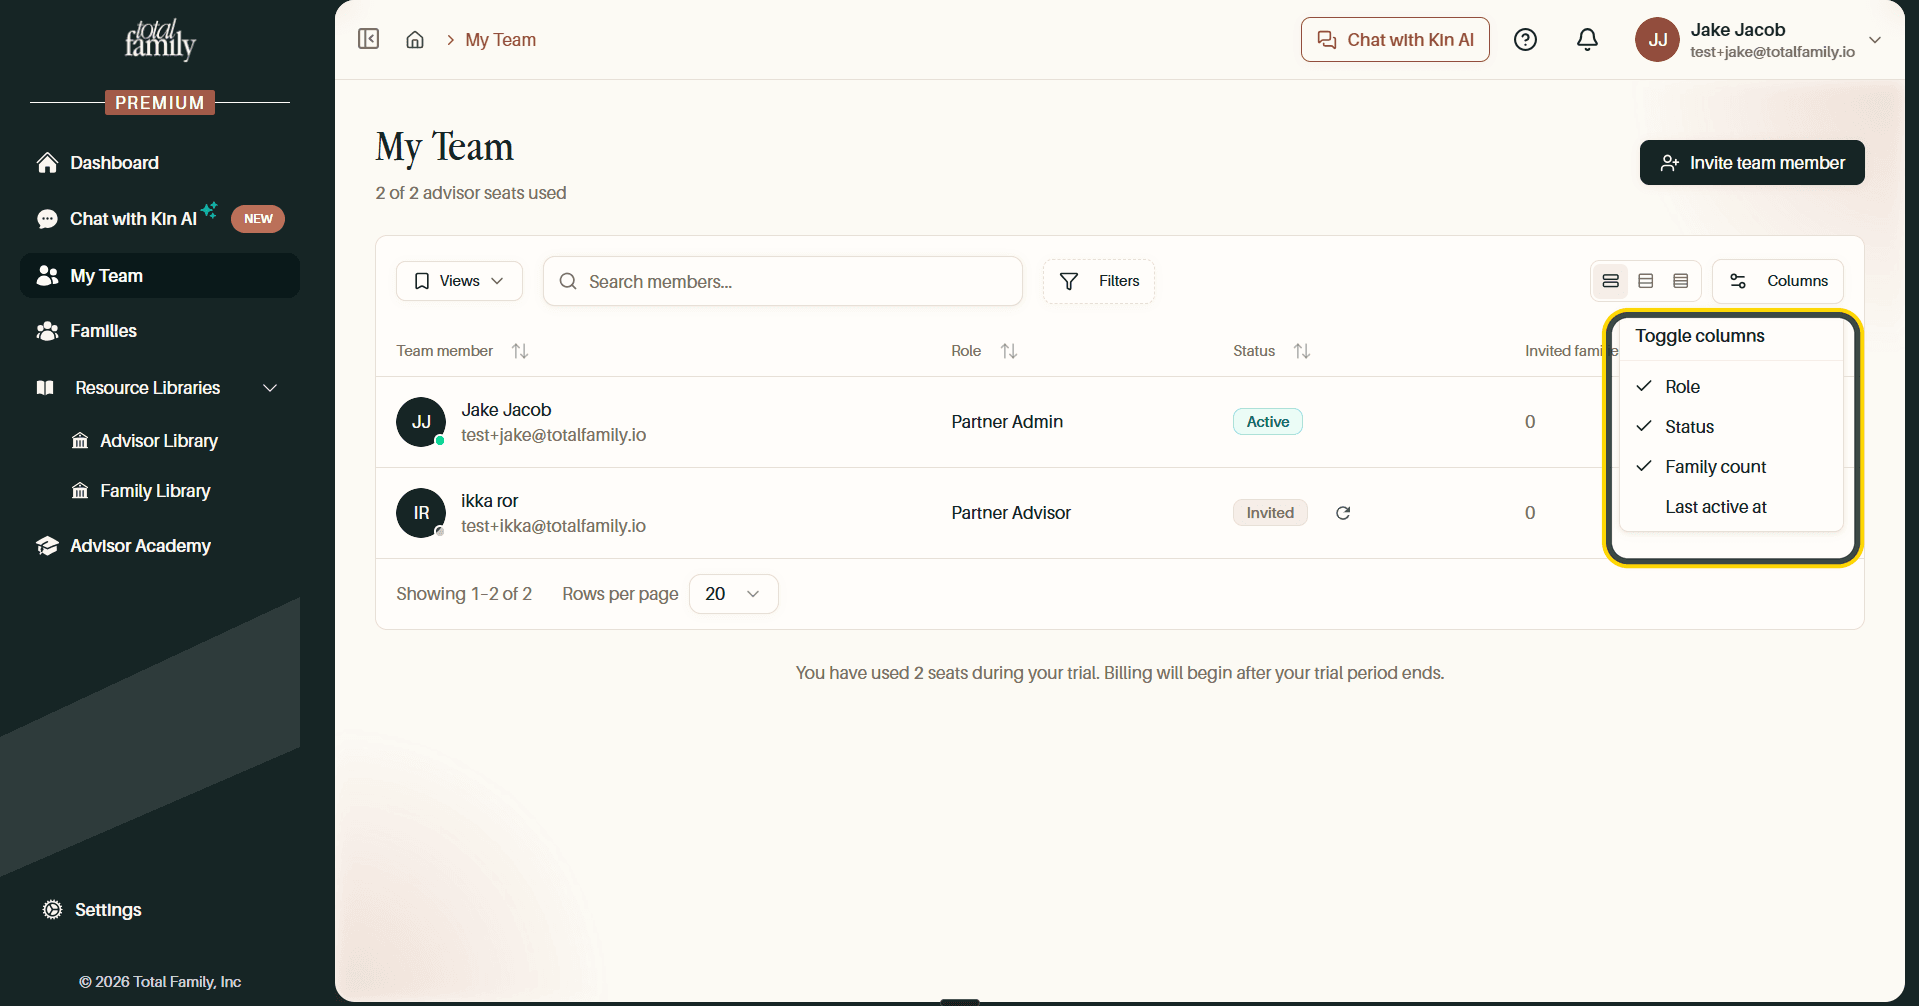
Tick or untick Role, Status, Family count, and Last active at. The last of these is hidden by default and worth turning on if you are tracking who is actually using the platform.
The three icons beside Columns switch row density, from comfortable to compact, so you can fit more of a large team on screen. Density, columns, and filters are all captured by a saved view.