
Guest Sharing
Invite someone outside your family and choose exactly what they can see.
Sharing lets you give someone outside your family a window into your portal: an advisor, a grandparent, a close friend. They see only what you switch on, and you can change or withdraw it at any time.
Invite Someone
Open Settings > Sharing. Until you have shared with anyone, the page explains what sharing is for and offers a single button.
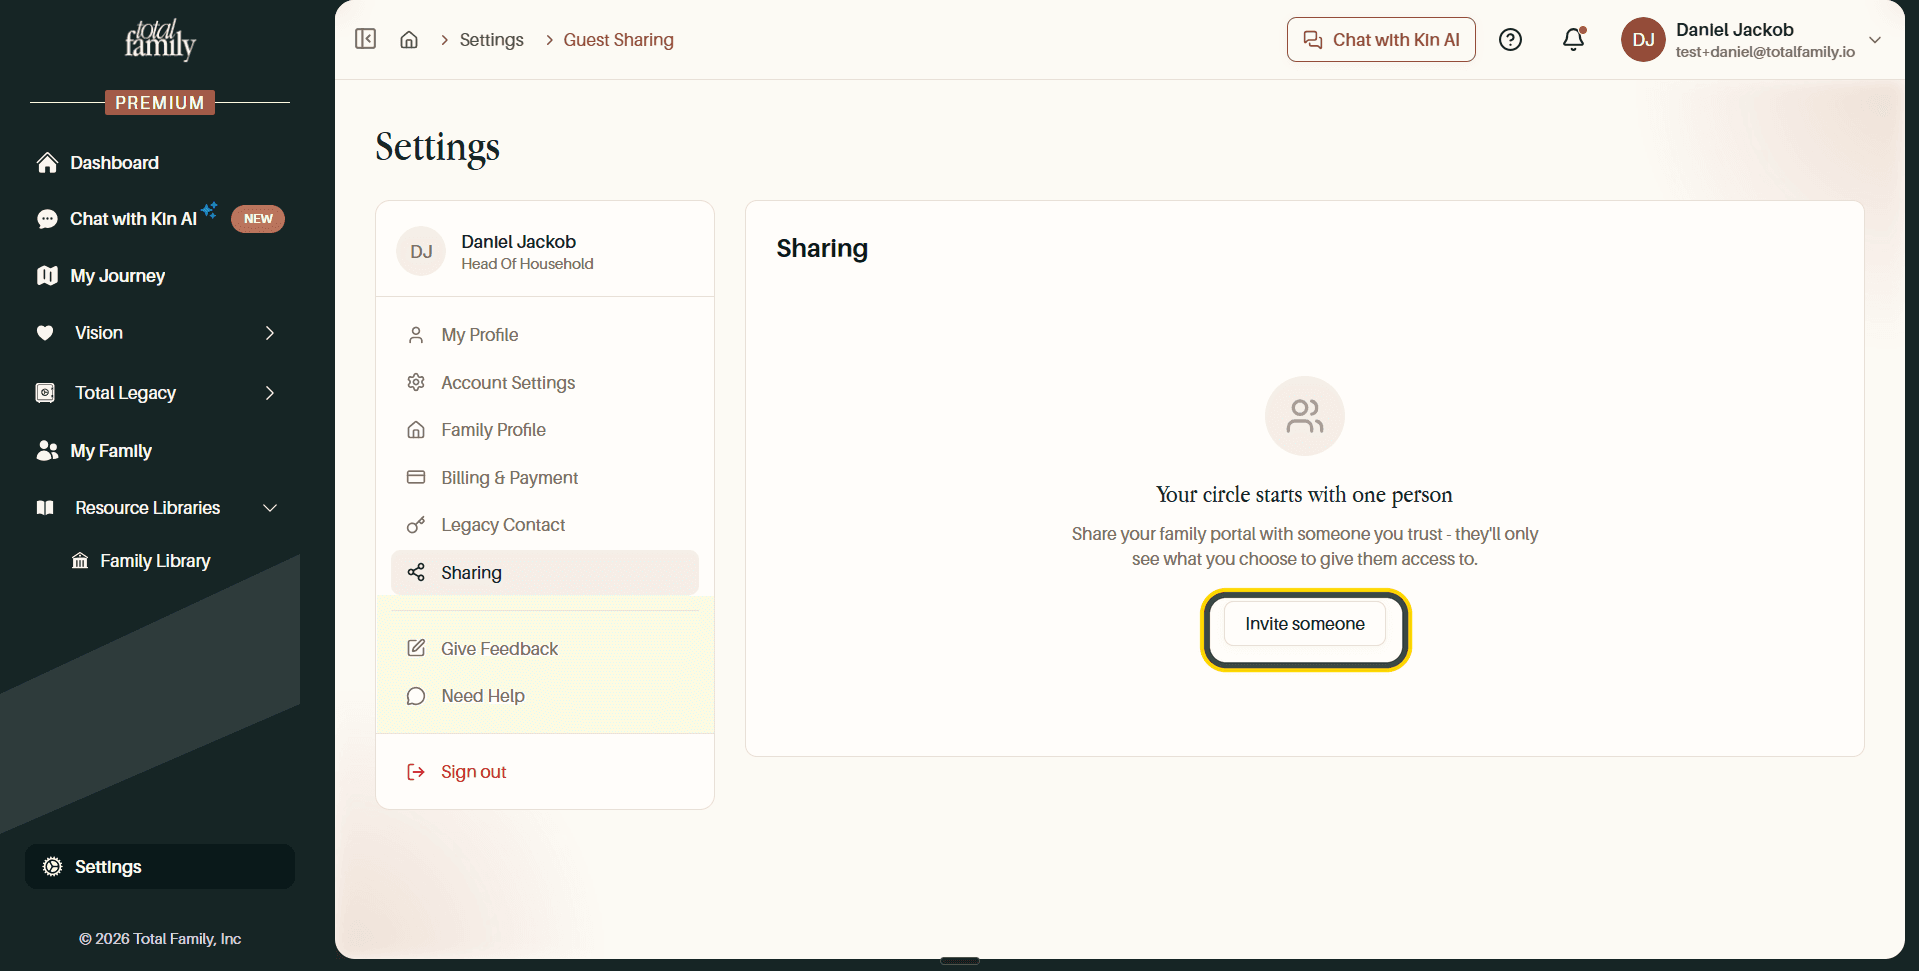
Select Invite someone. Once you have guests, the same action sits as + Invite at the top right.
The Invite Dialog
Everything happens in one dialog.
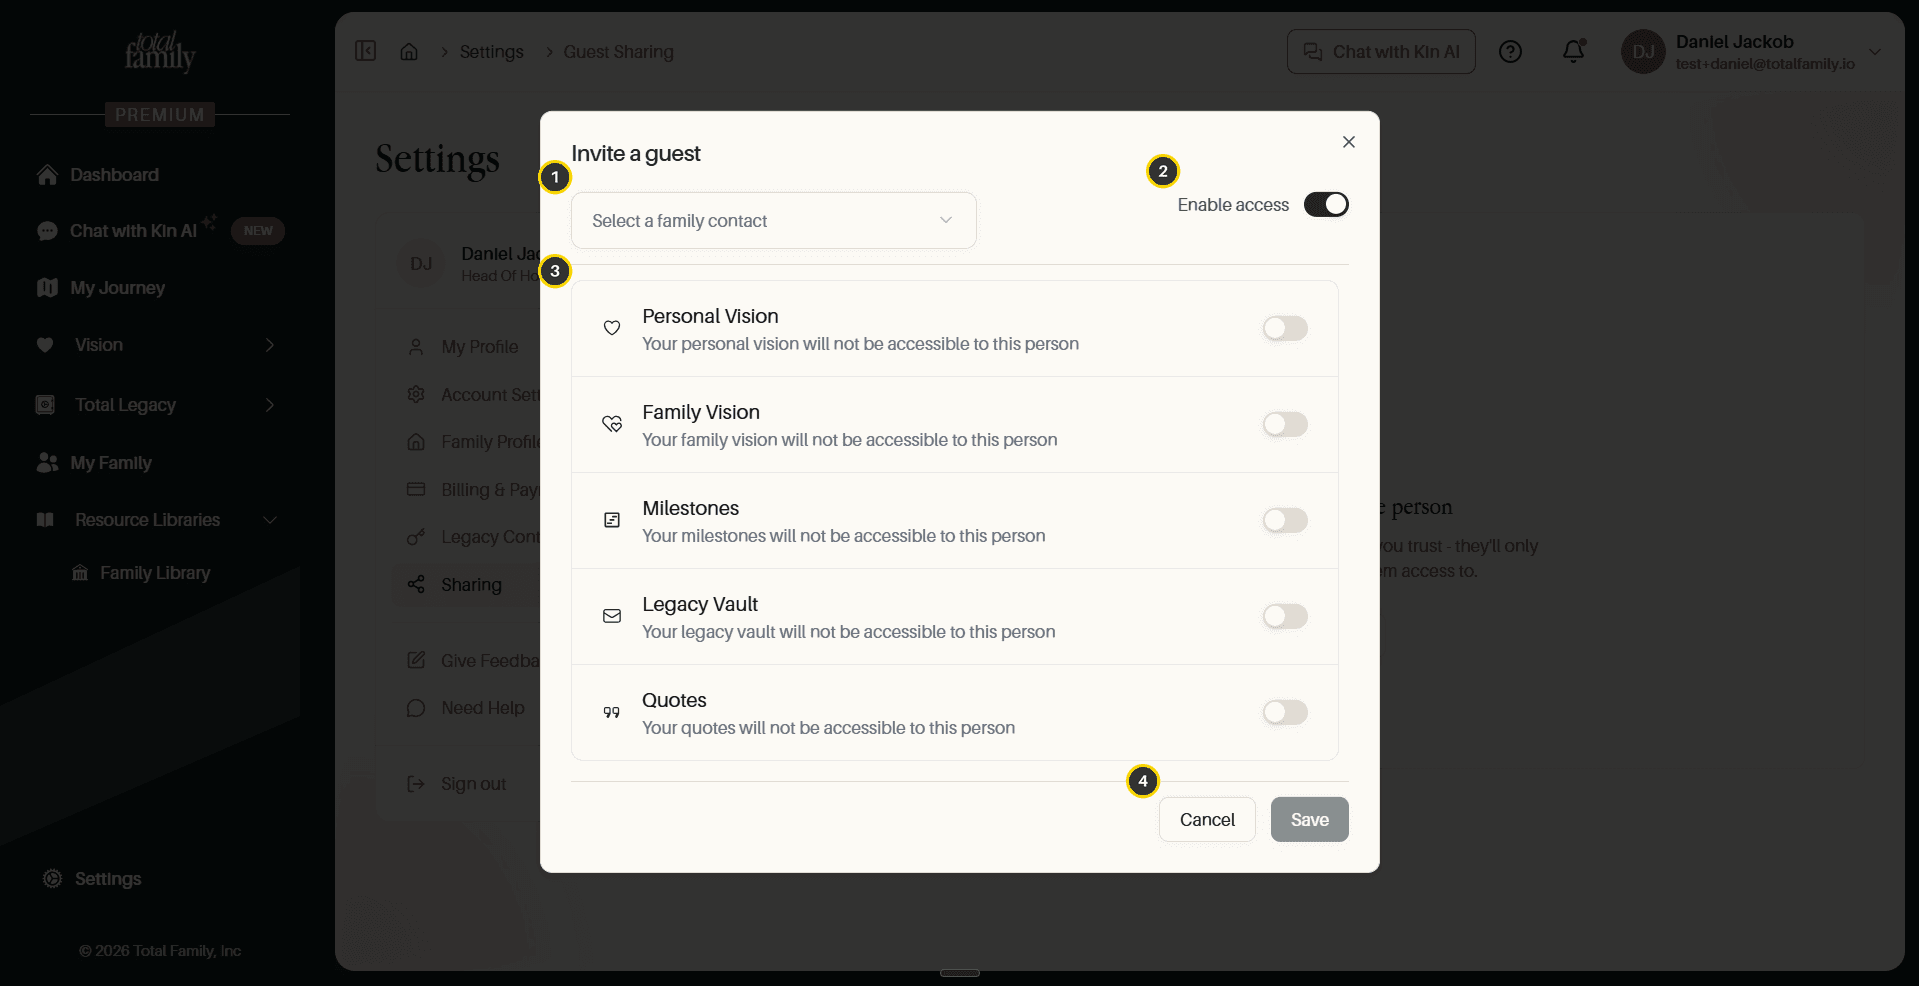
- Select a family contact: who you are inviting.
- Enable access: the master switch for this guest. On by default.
- Feature toggles: one per area of your portal, all off to begin with.
- Save / Cancel: commit the invitation, or back out without inviting anyone.
Enable access and the individual toggles do different jobs. The master switch decides whether this guest has any access at all; the five toggles decide what. Turning the master switch off suspends everything without losing your per-feature choices.
Choose the Contact
Opening the picker lists the family contacts you already have, with the option to create one.
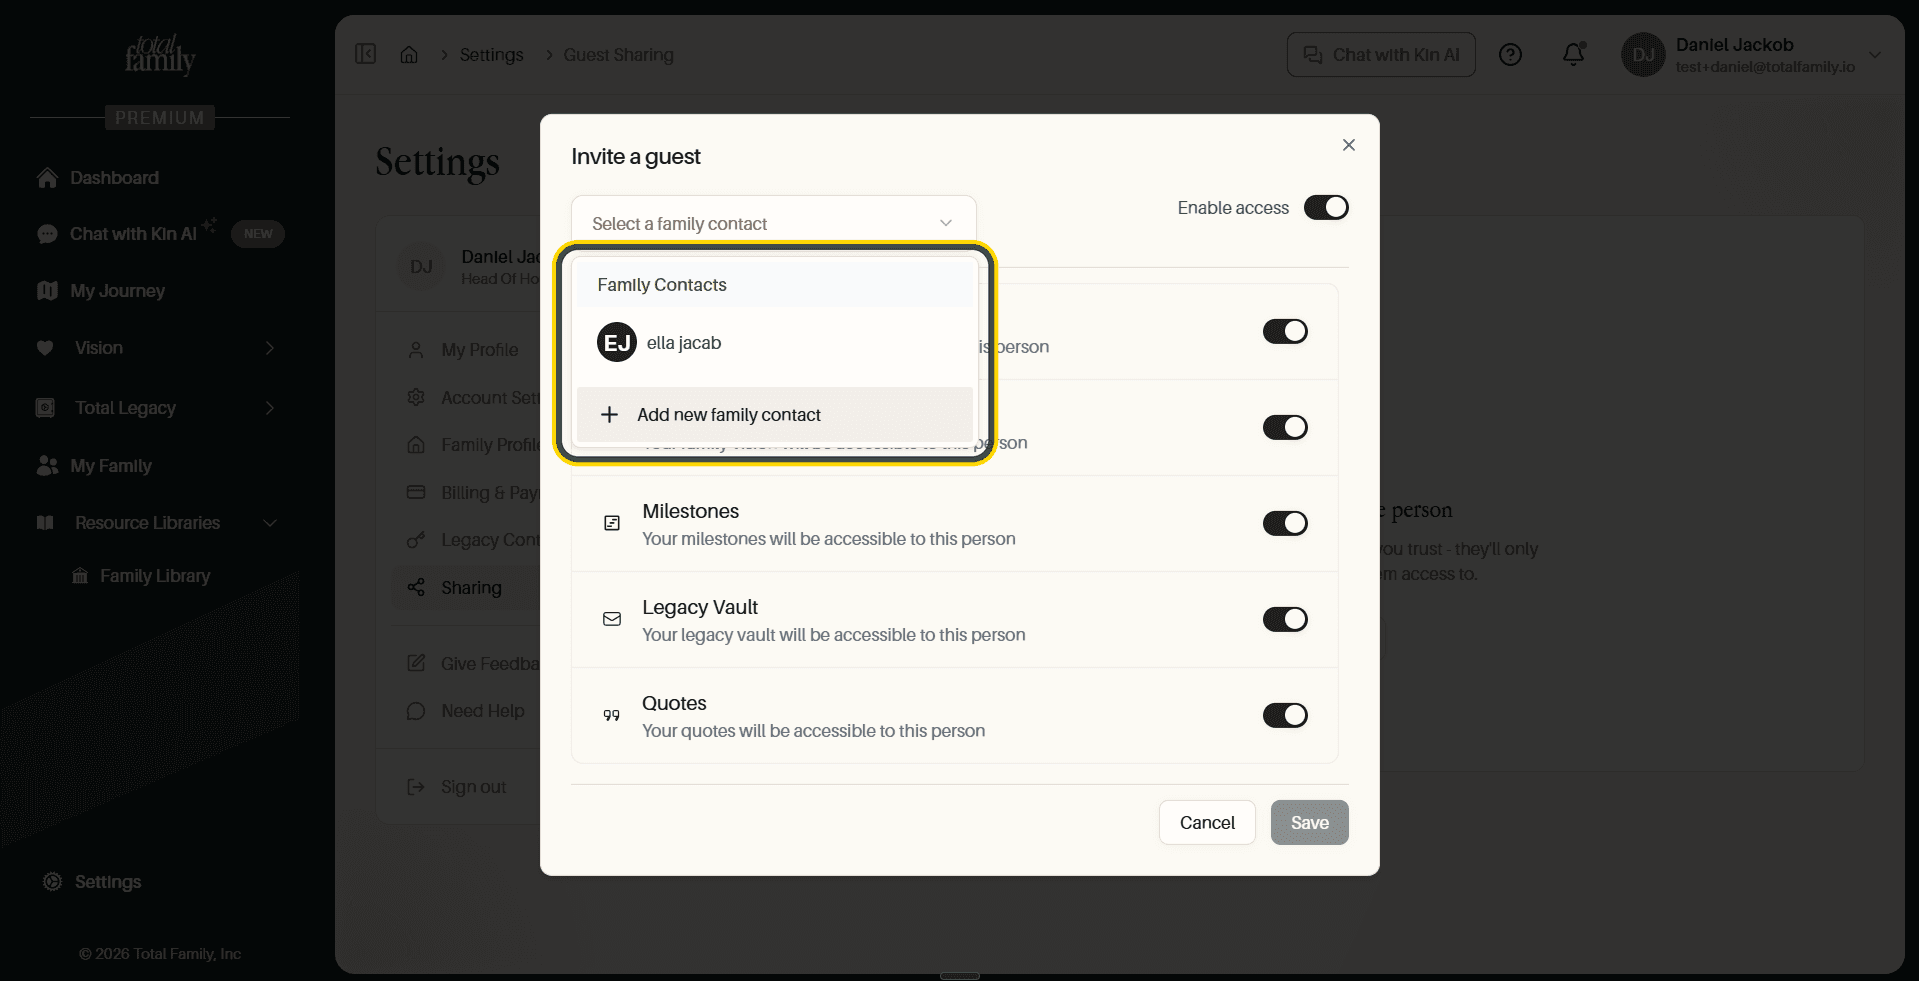
Pick an existing contact, or select Add new family contact.
Add Someone New
First Name, Last Name, and Email are required. Phone, location, and relationship are optional.
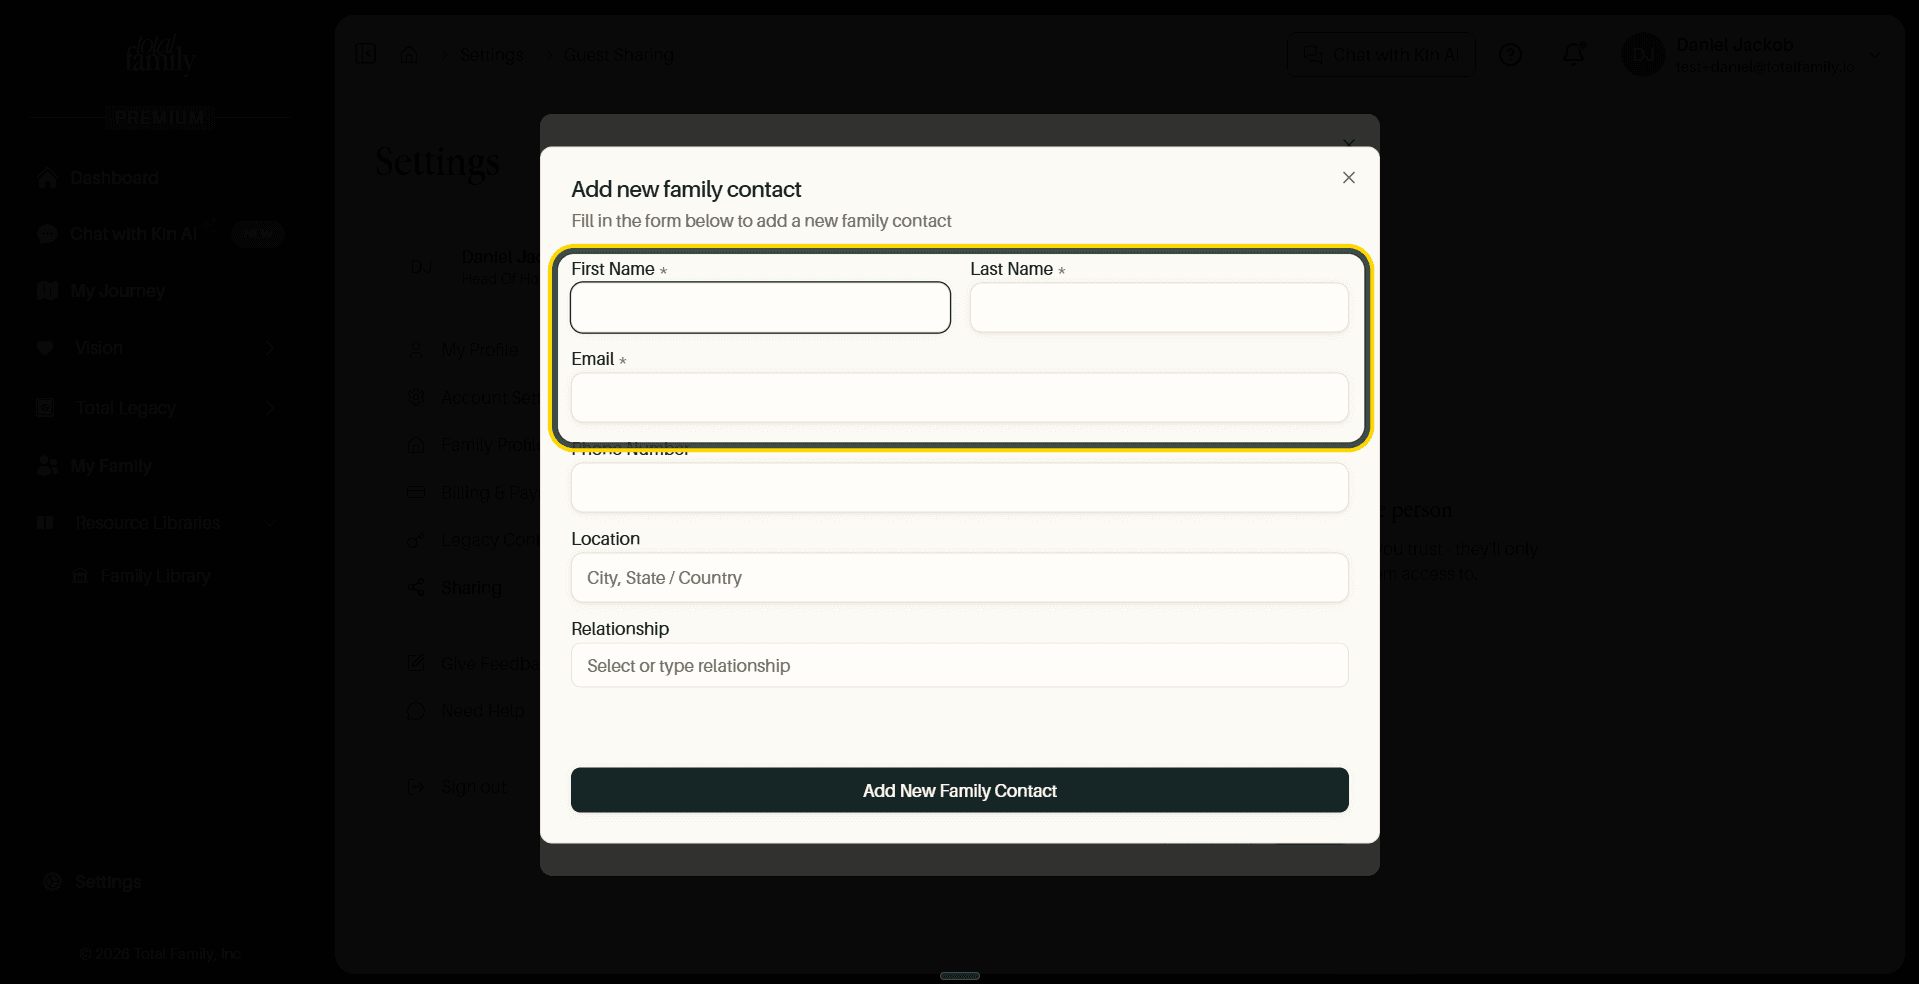
The email address is where their invitation goes, so check it before saving.
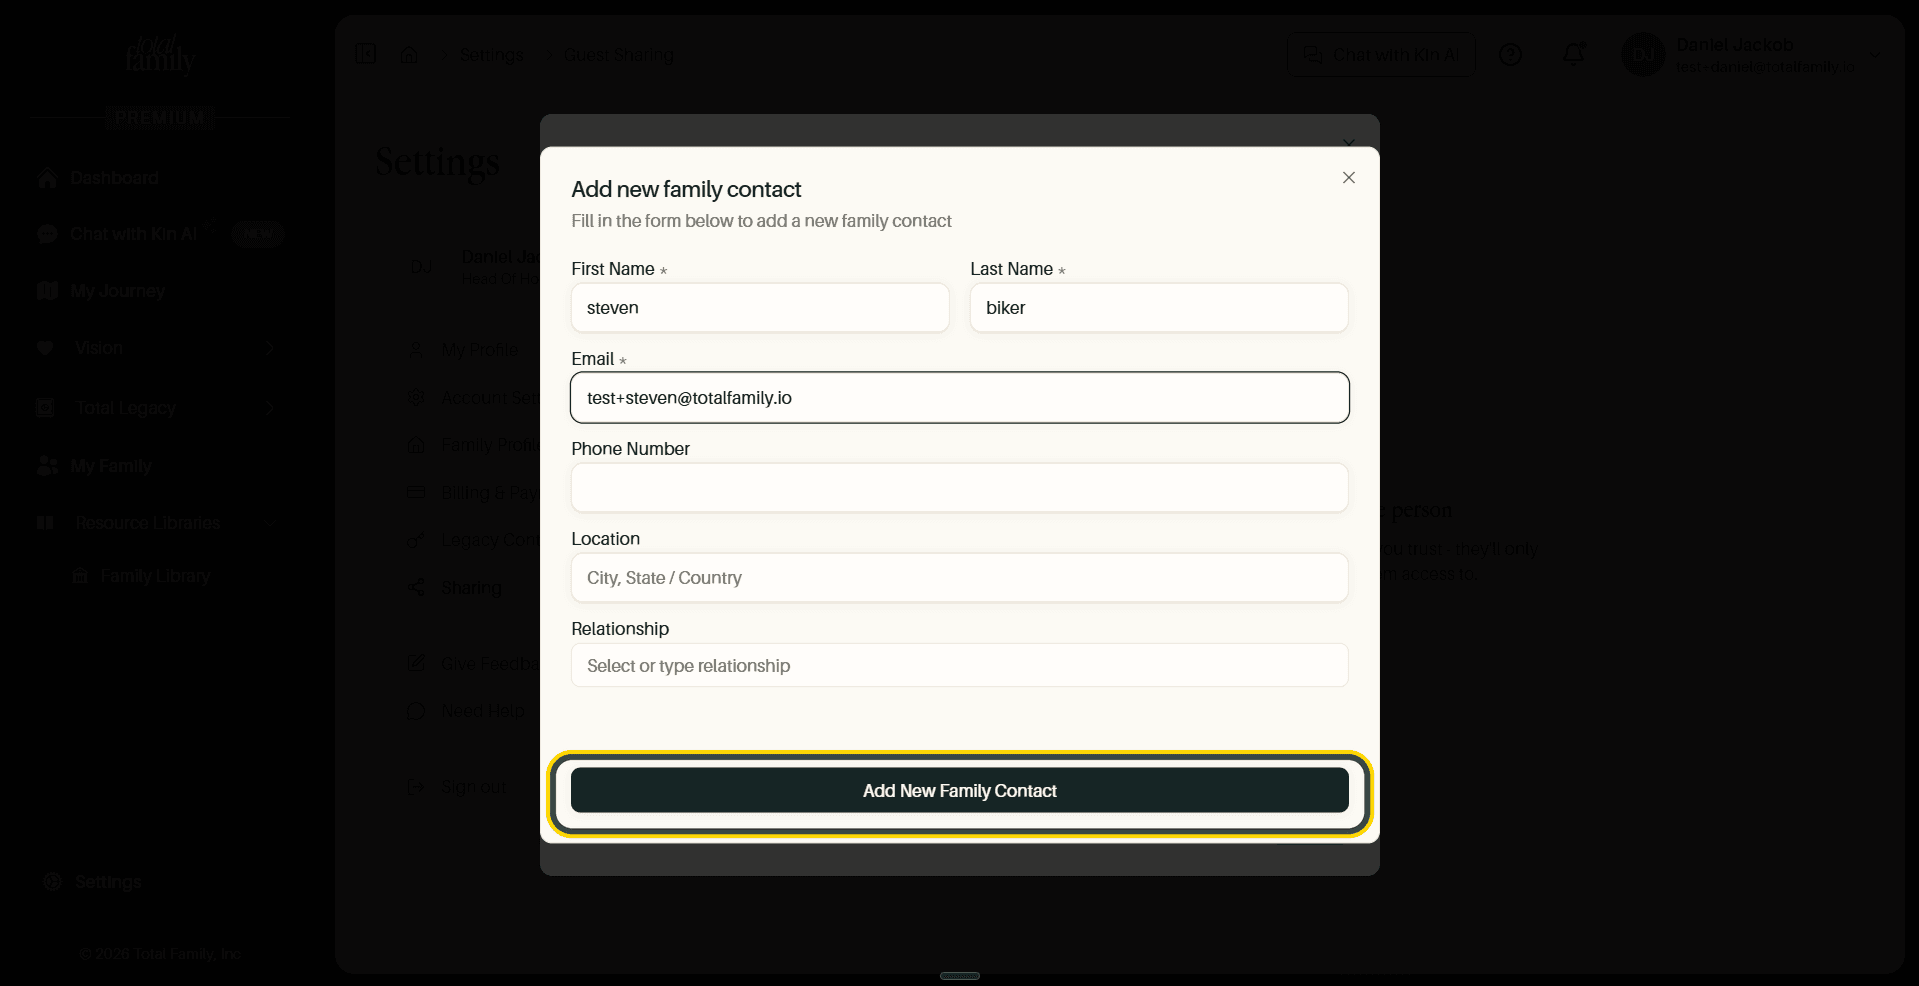
Select Add New Family Contact and you return to the invite dialog with them selected.
Choose What They Can See
With a contact chosen, switch on each area you want to share.
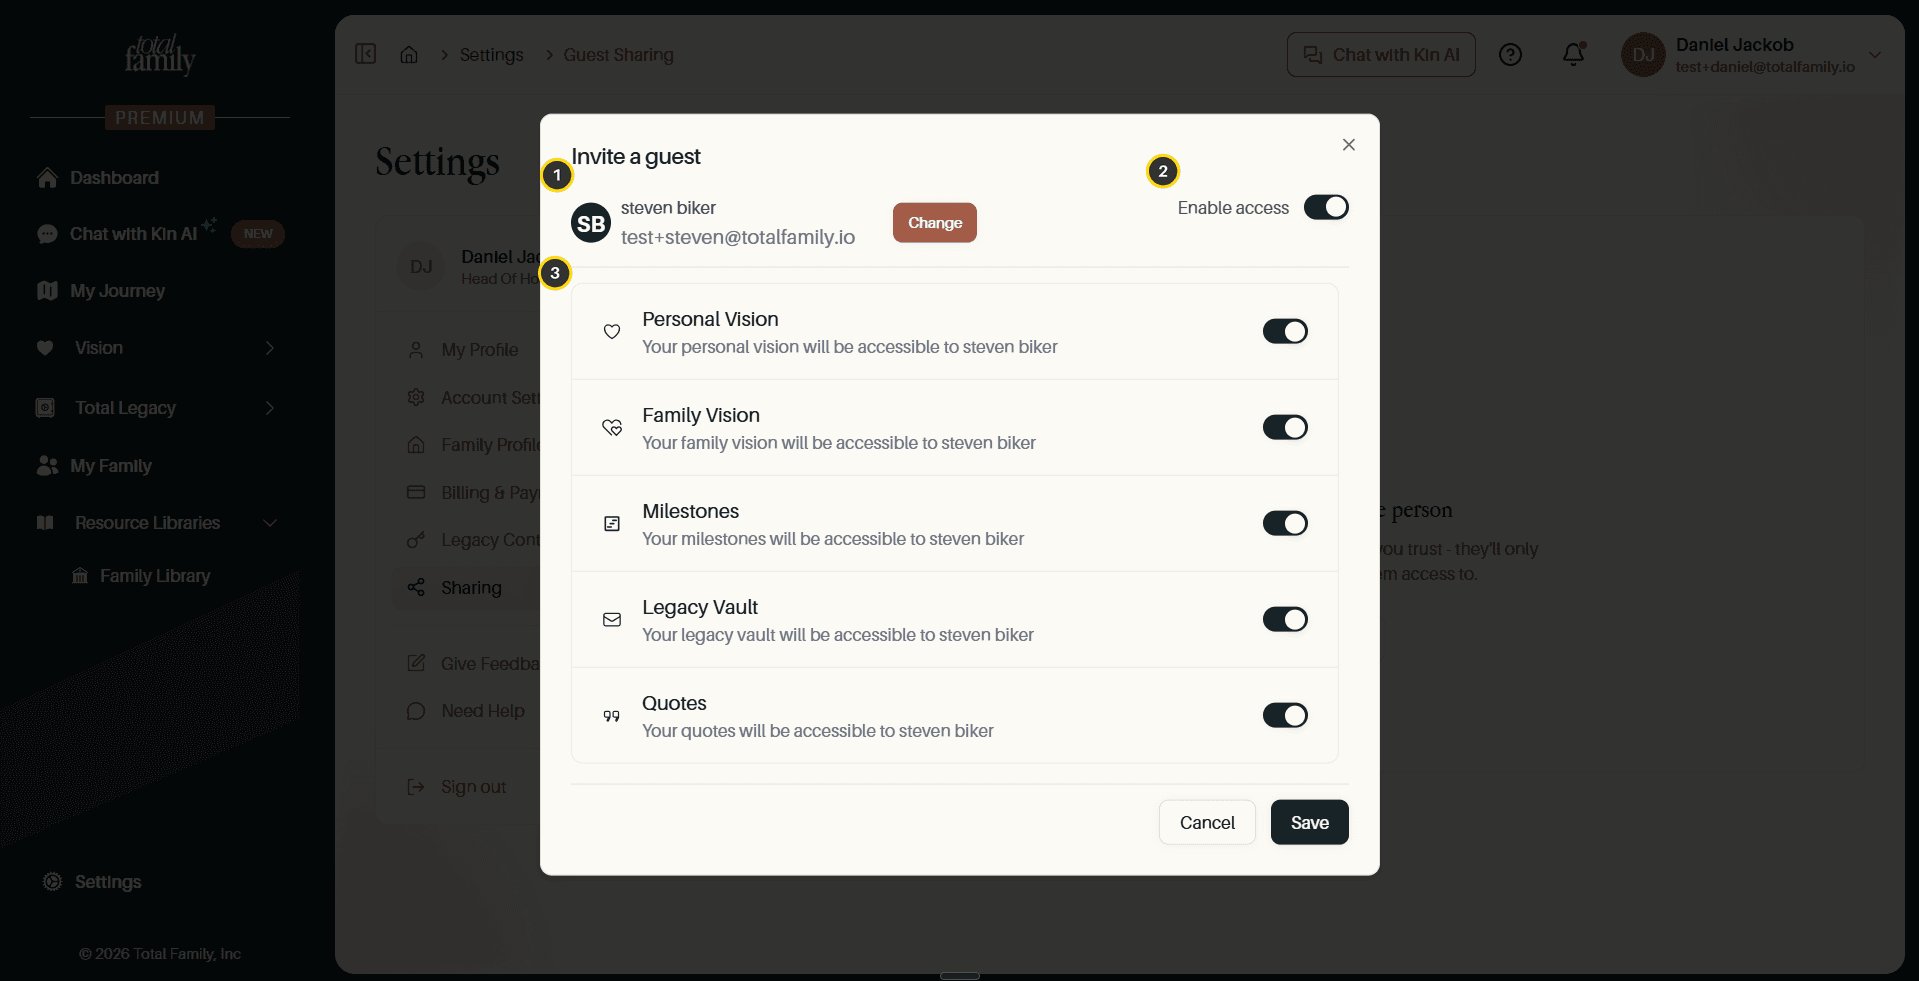
- The selected guest: with Change if you picked the wrong person.
- Enable access: still the master switch.
- Feature toggles: Personal Vision, Family Vision, Milestones, Legacy Vault, and Quotes.
The line under each name states the current position in plain words, and updates to name your guest: "Your milestones will be accessible to steven biker". You can read back exactly what you are about to grant.
Select Save to send the invitation, or Cancel to discard it.
Tip Share the narrowest set that does the job. Someone helping with financial planning probably needs your Family Vision and not your Legacy Letters. You can always add more later.
The Guest List
Saved guests appear on the Sharing page.
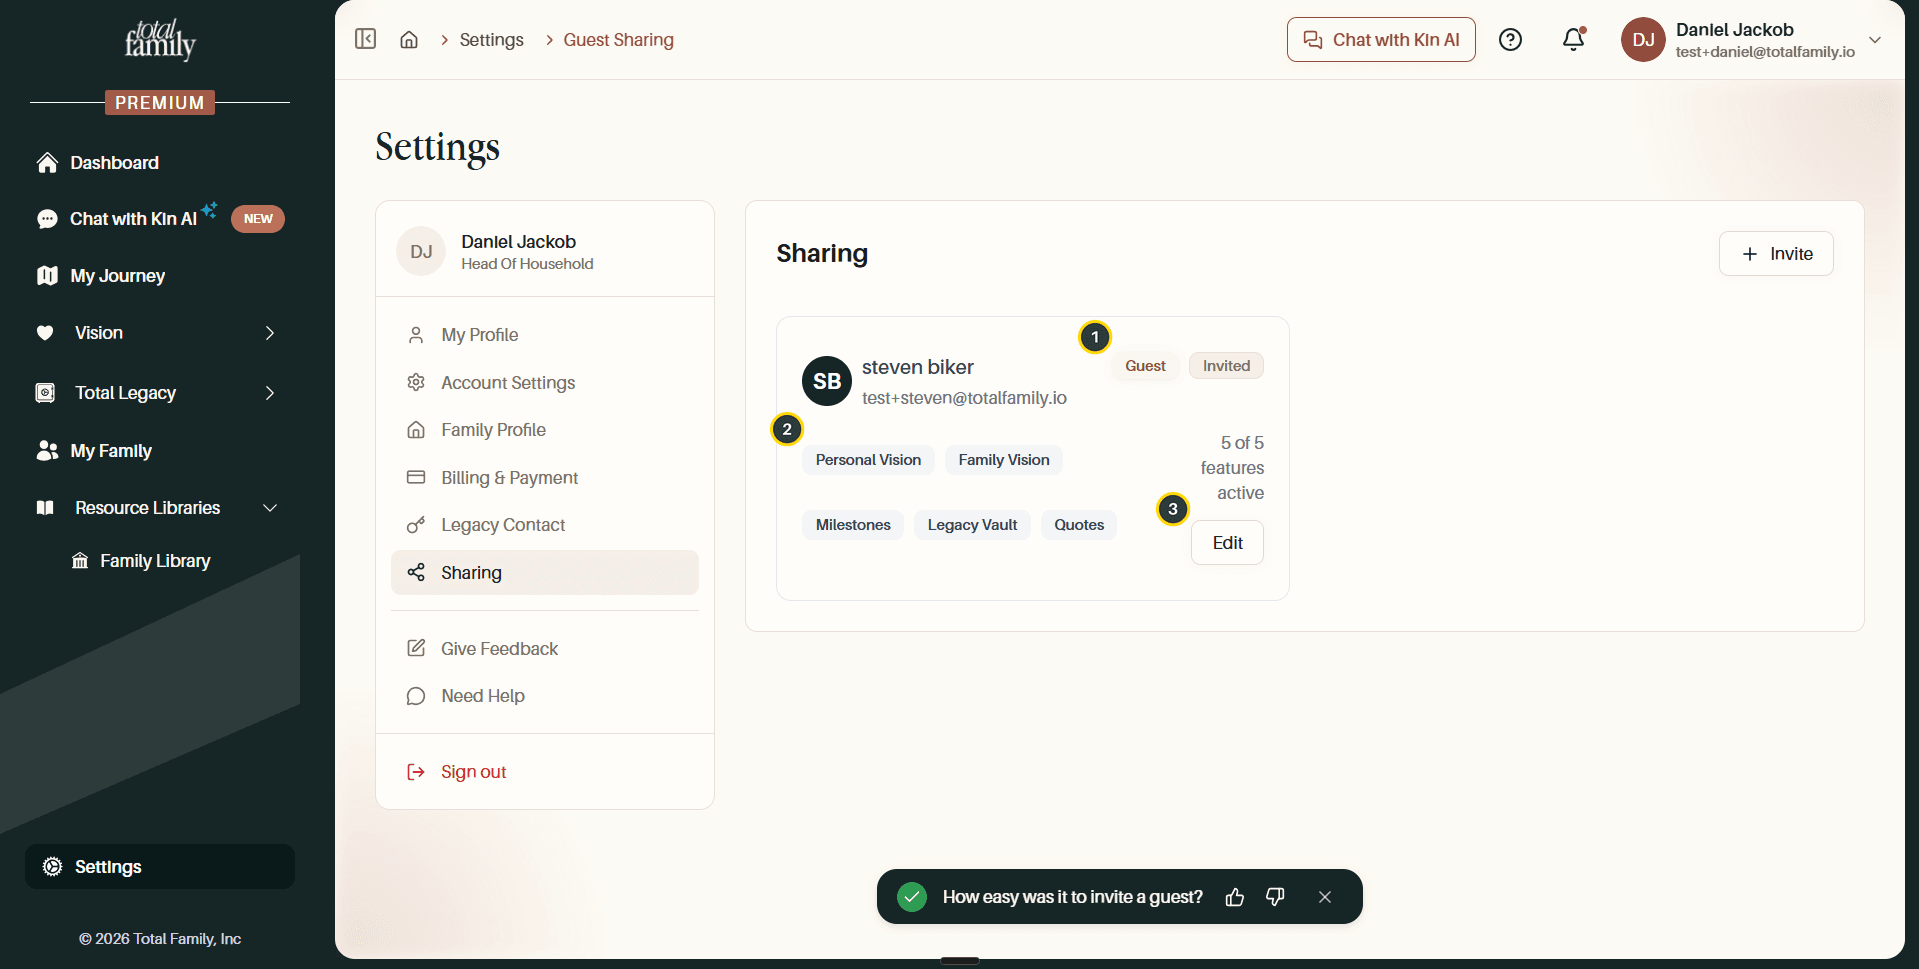
- Role and status: Guest, and whether they are Invited or have accepted.
- Shared features: a chip for each area they can see, with a count beside it.
- Edit: reopens the dialog to change permissions or switch access off.
Guests are read-only. They can look at what you shared, and nothing else. They cannot edit your vision, add milestones, or see anything you left switched off.