
Settings
Your profile, password, family details, billing, and where to get help.
Settings holds everything about your account rather than your content: who you are, how you sign in, your family's details, what you pay, and how to reach us. Open it from the bottom of the sidebar.
The left column lists every section, with your name and role at the top so you always know which account you are looking at.
My Profile
Your own details, the ones that appear beside anything you create.
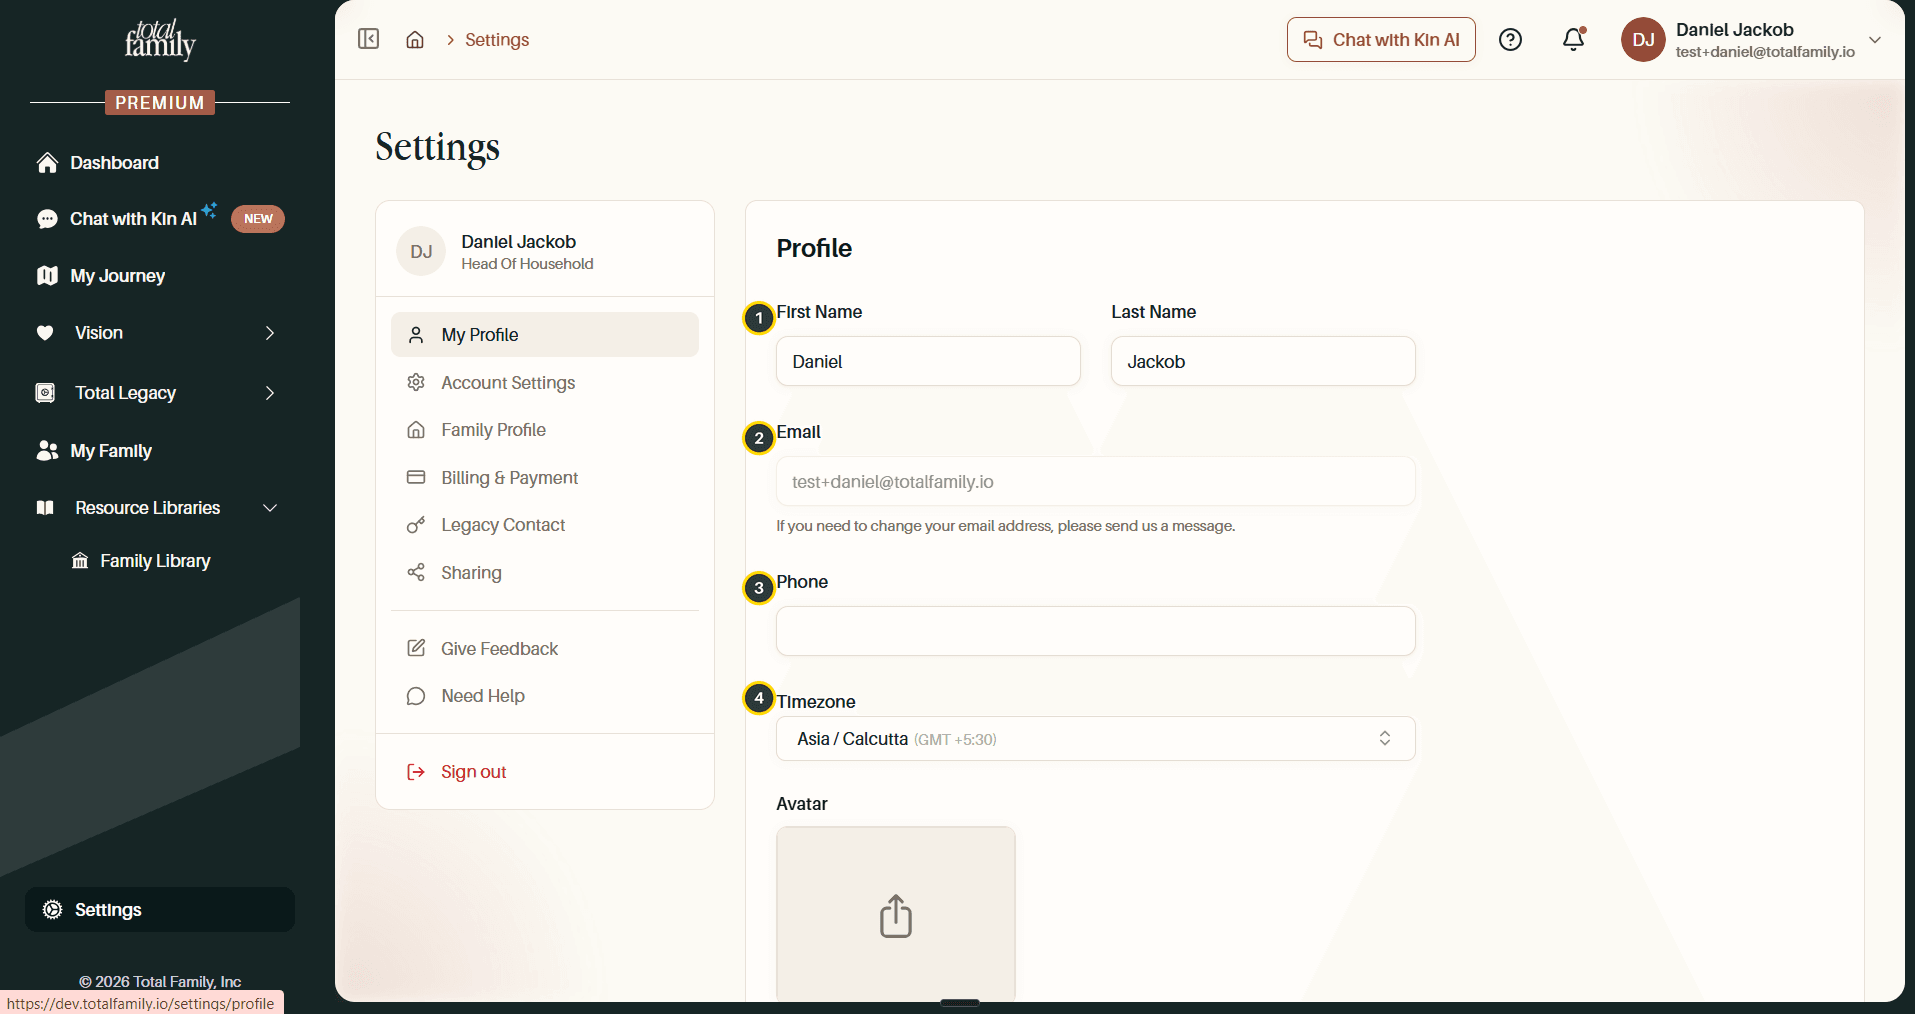
- First Name and Last Name
- Email: shown but not editable. To change it, send us a message using Need Help.
- Phone: optional, and only used if you turn on text notifications below.
- Timezone: keeps dates and reminders correct for where you are.
Scroll down for your photo and notification preference.
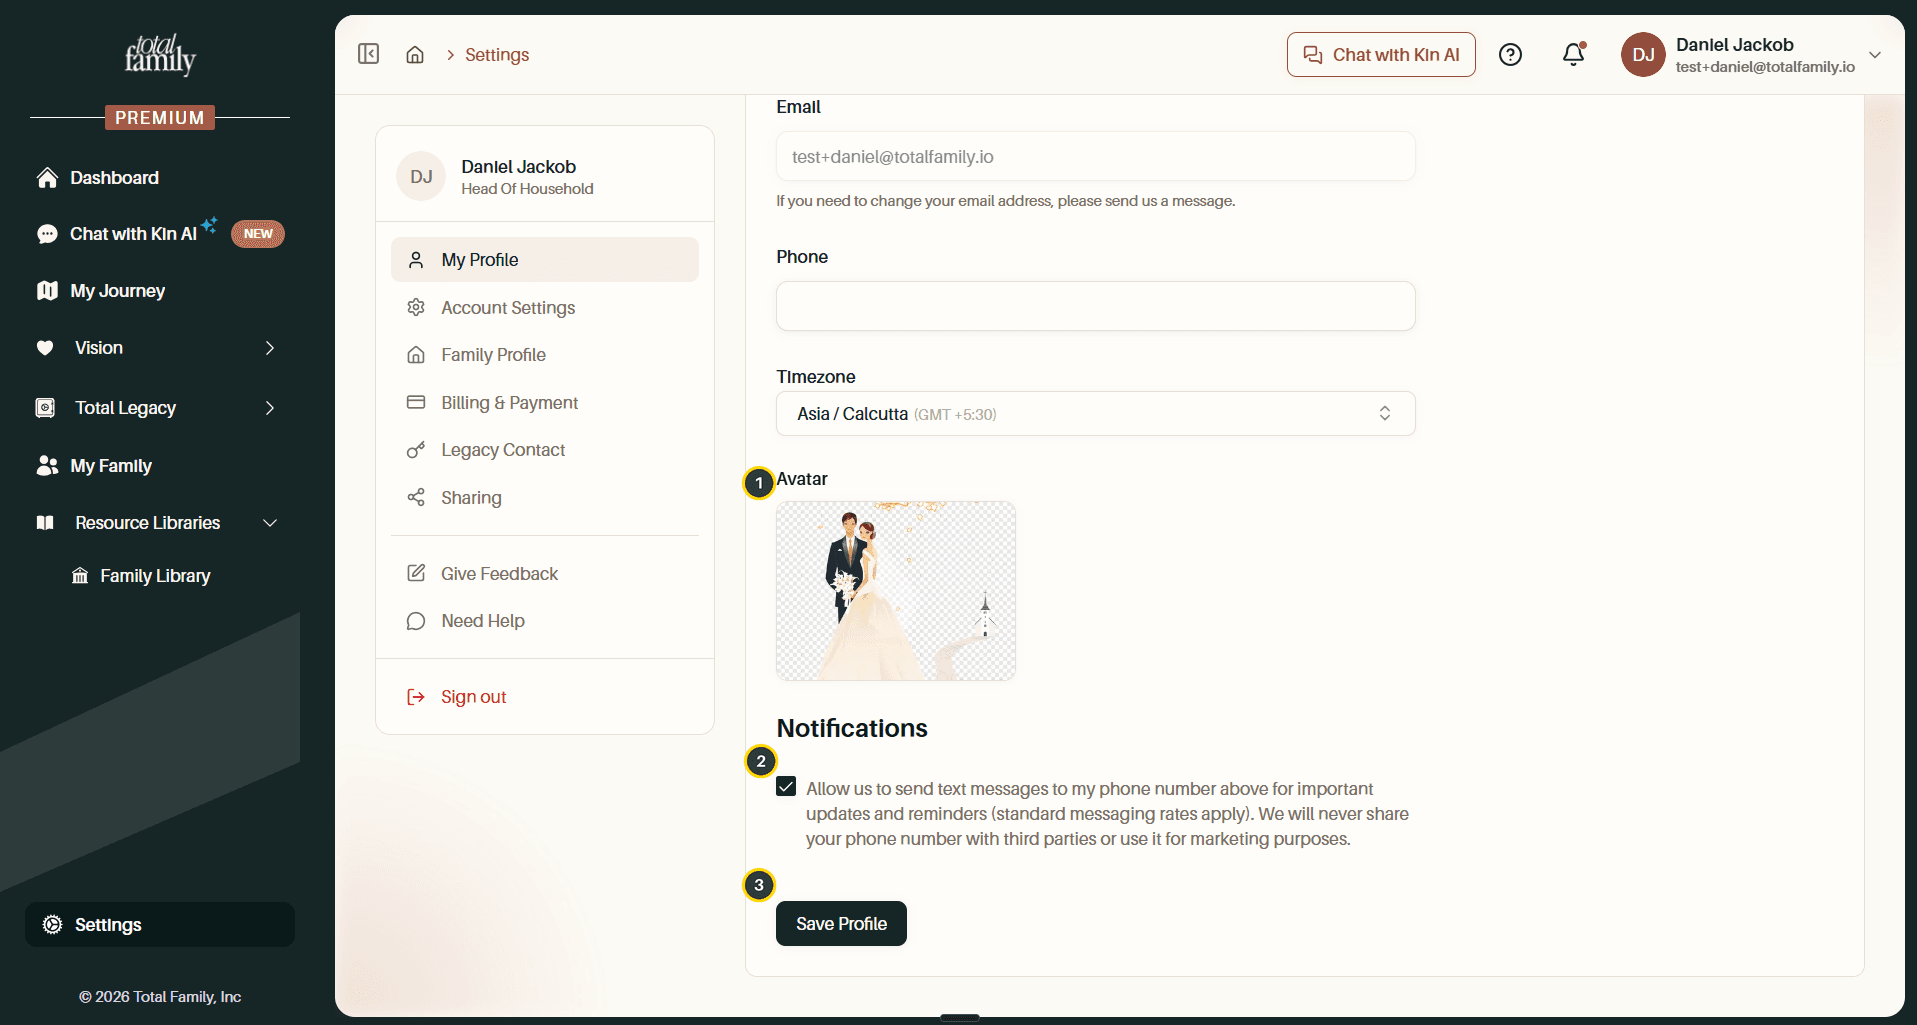
- Avatar: the picture shown next to your name. Select it to upload a new one.
- Notifications: allow text messages for important updates and reminders. Standard message rates apply, and your number is never shared or used for marketing.
- Save Profile: nothing is stored until you select this.
Account Settings
How you sign in. Your email address is shown here, and this is where you add a password.
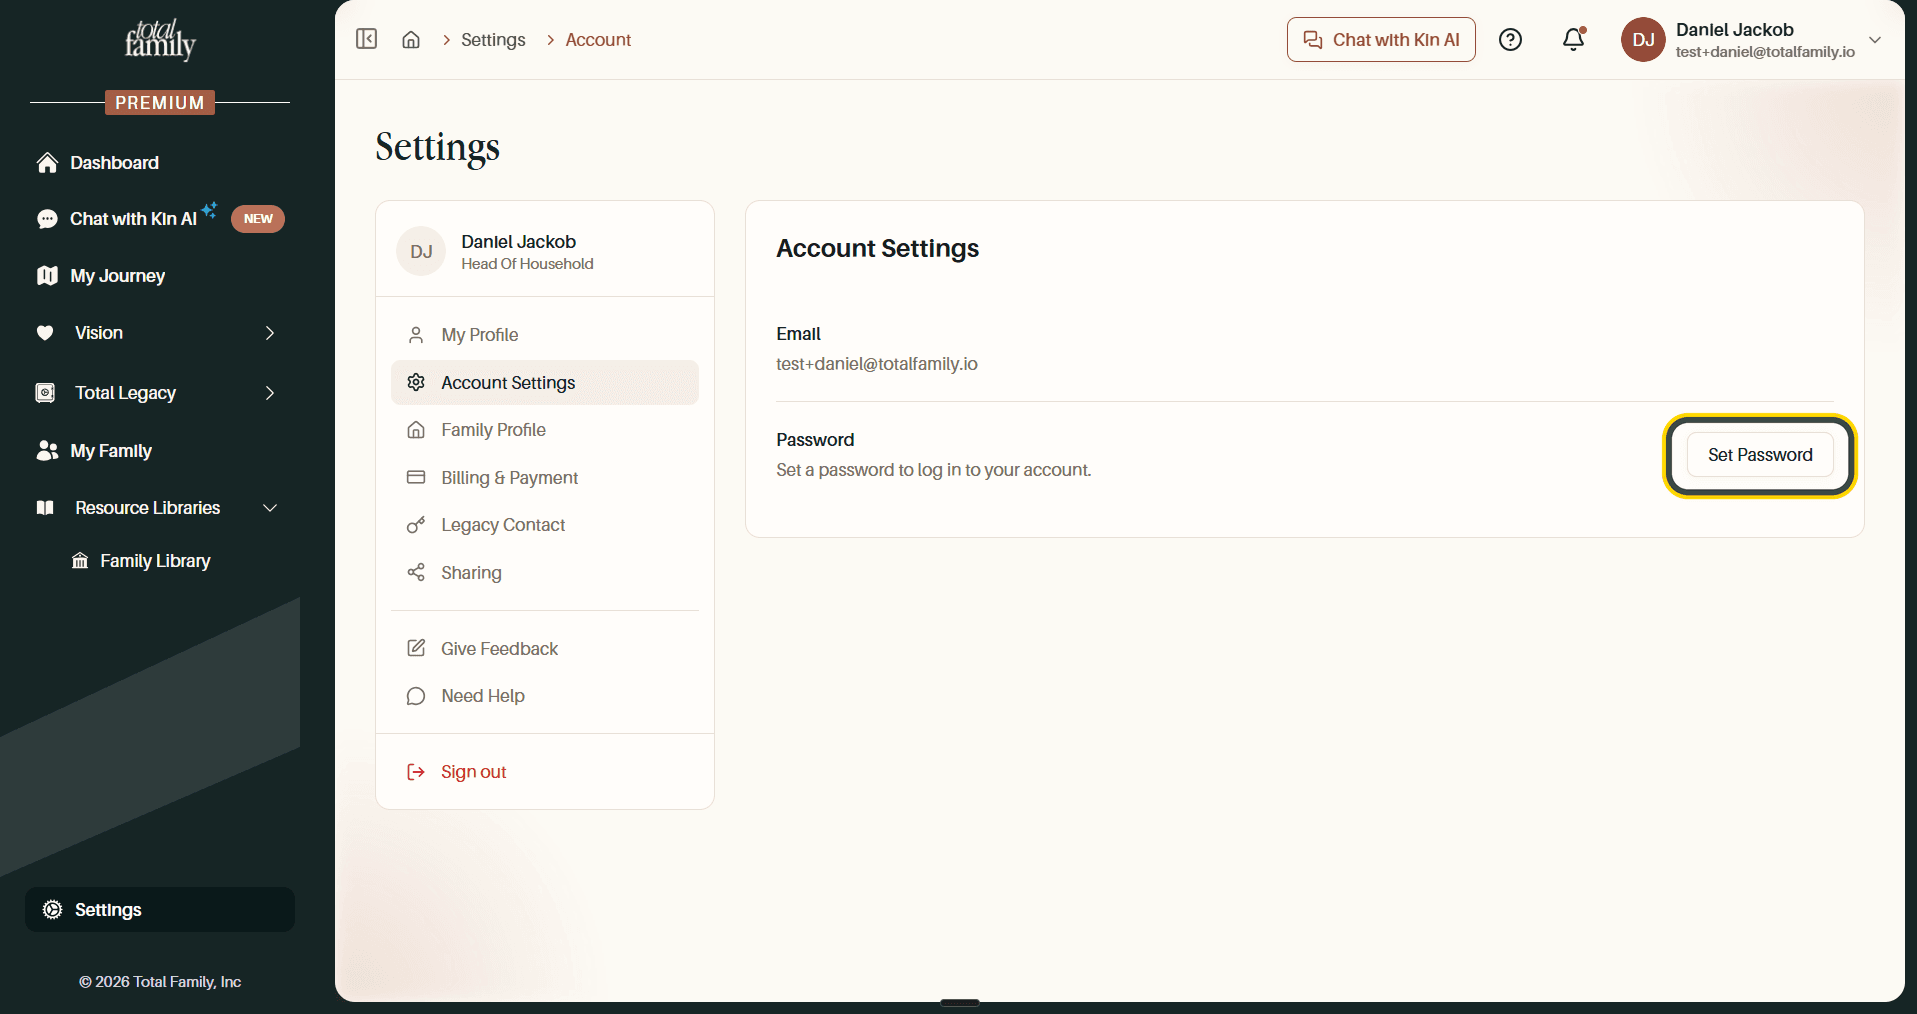
If you have only ever signed in with a verification link, you will not have a password yet. Adding one gives you a second way in.
Set a Password
Setting a password takes three steps, because changing how you sign in needs to be confirmed first.
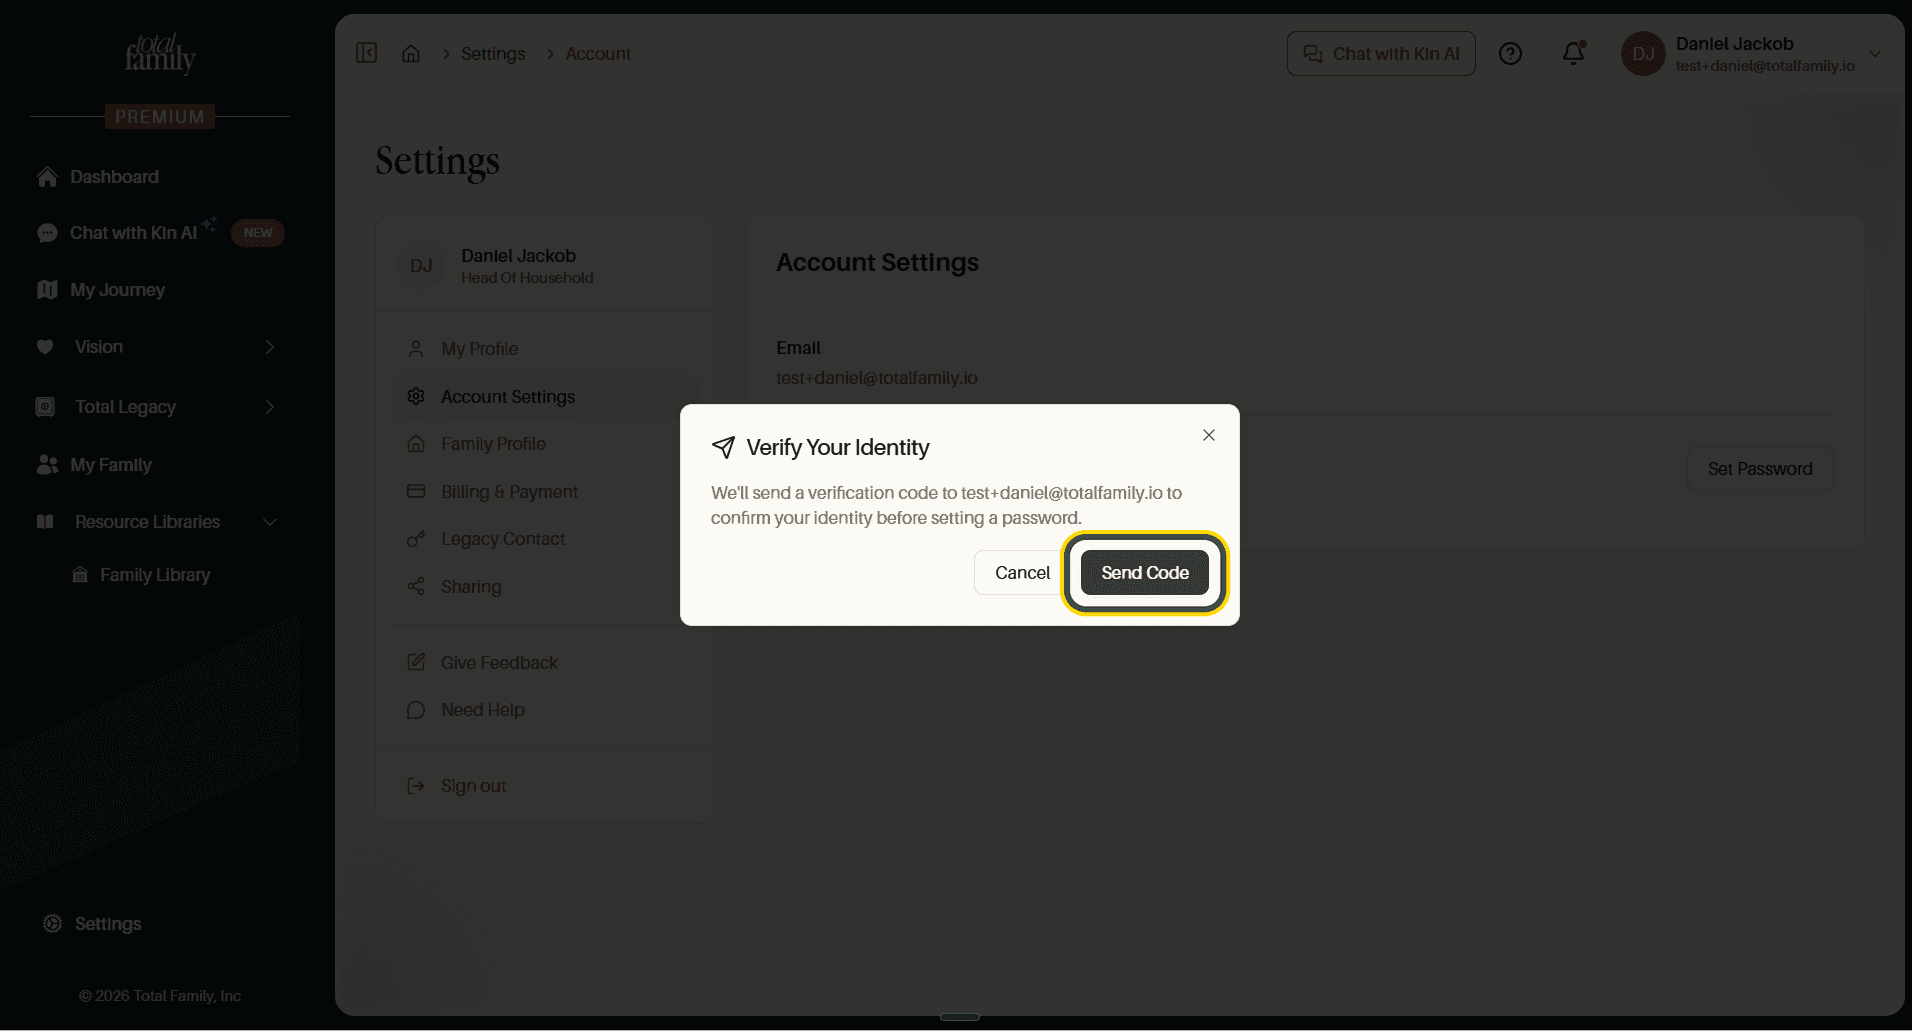
1. Confirm it is you. Select Set Password and Total Family offers to send a code to your email address. Select Send Code.
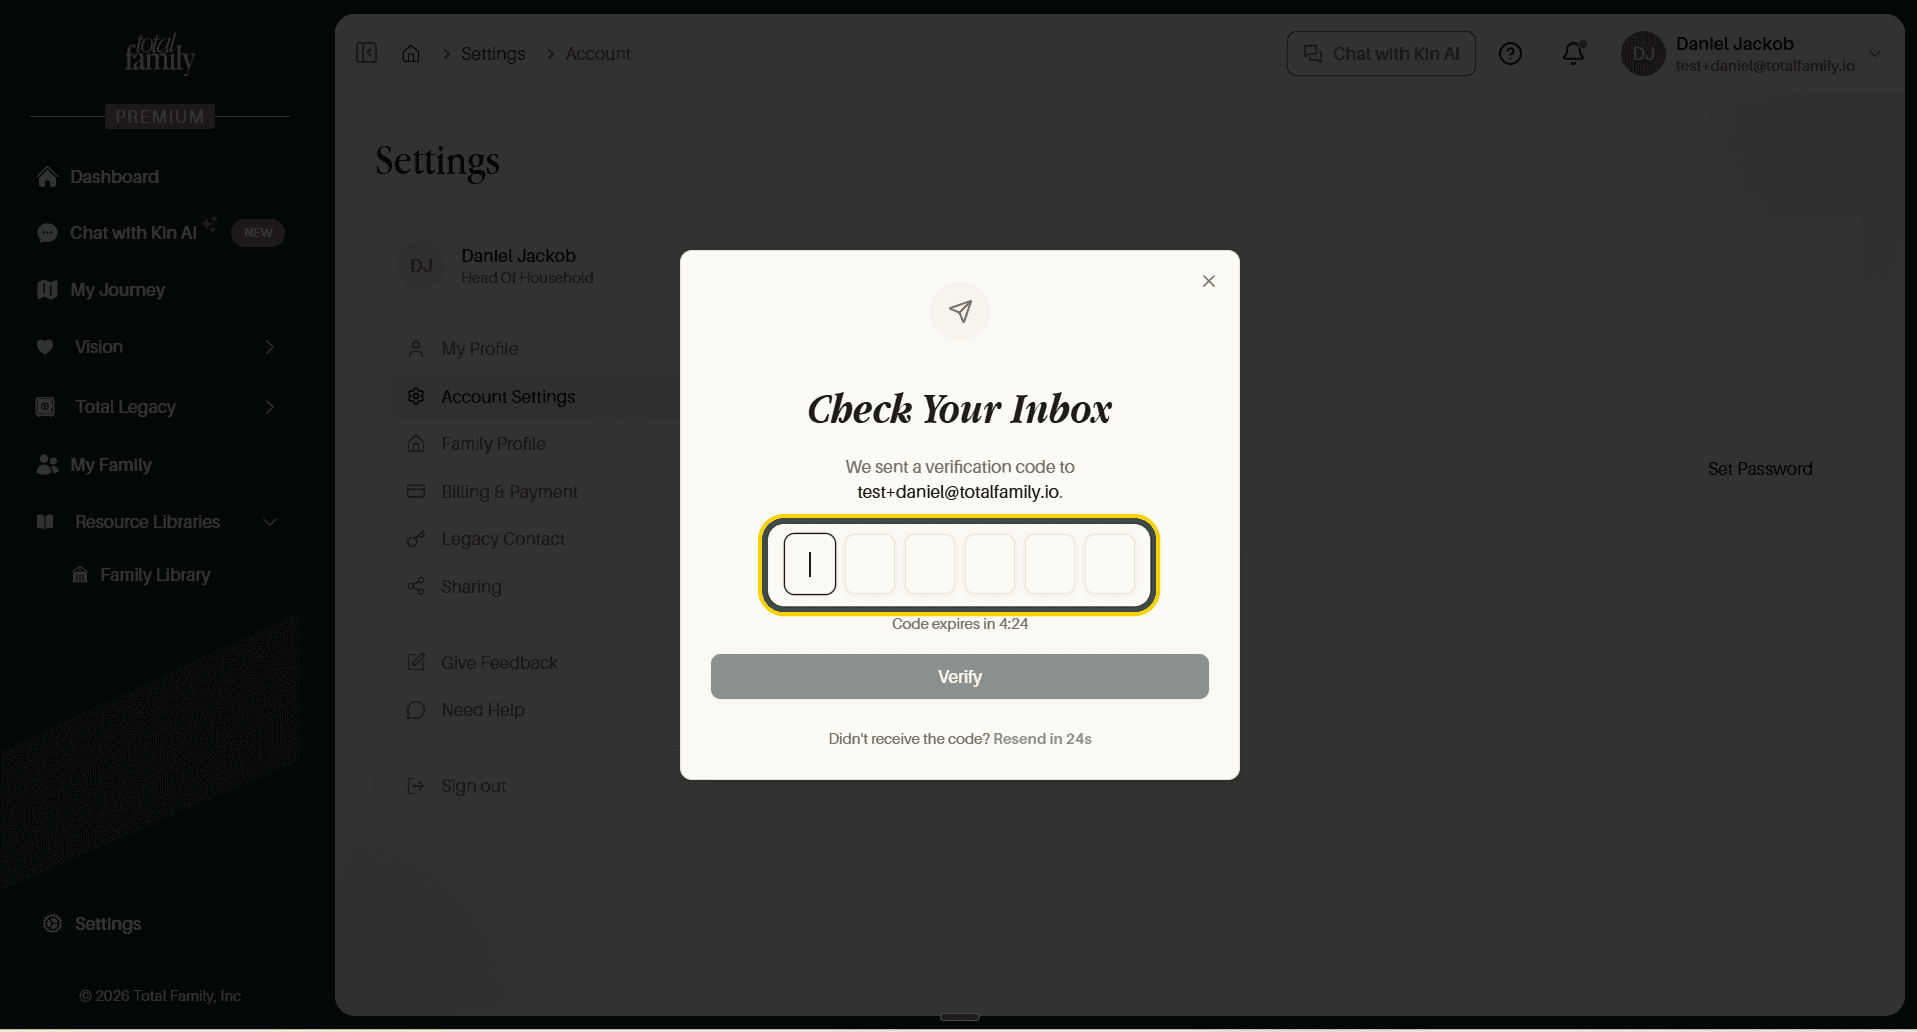
2. Enter the code. Type the six digits from the email. The code expires after a few minutes, and there is a resend link if it does not arrive.
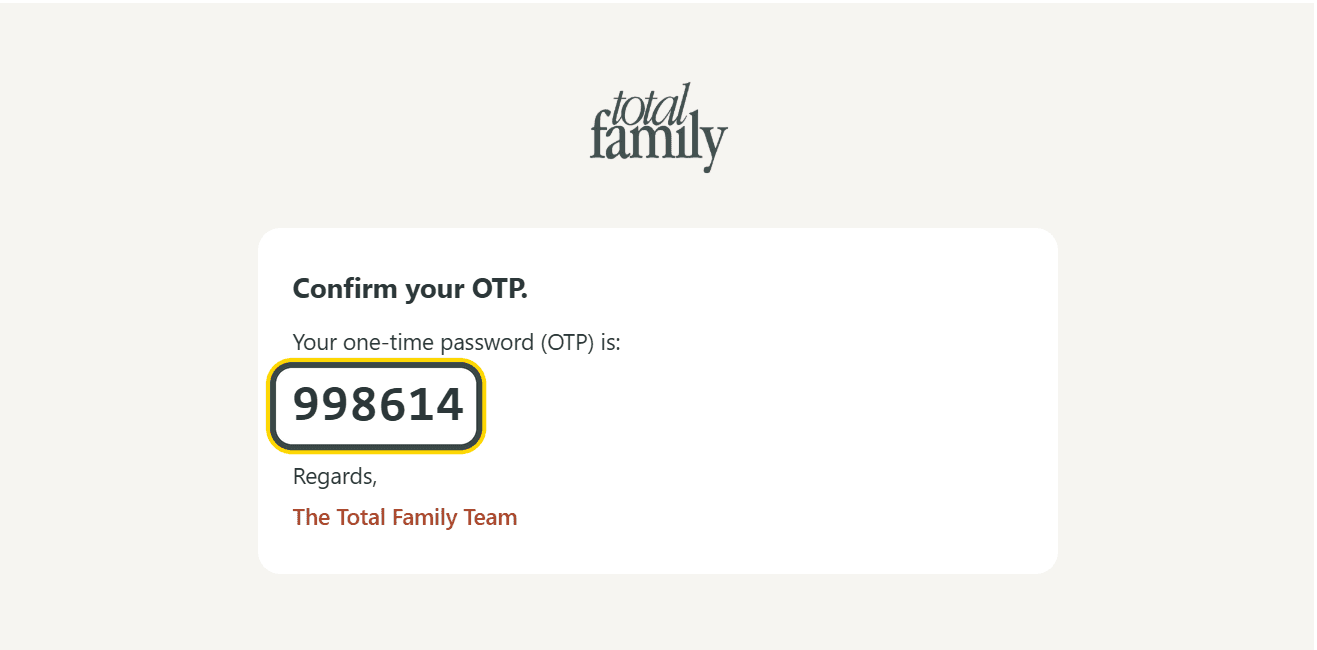
The email looks like this. The code shown is only an example; yours will be different.
3. Choose a password. Your new password has to meet five rules, and the list ticks them off as you type.
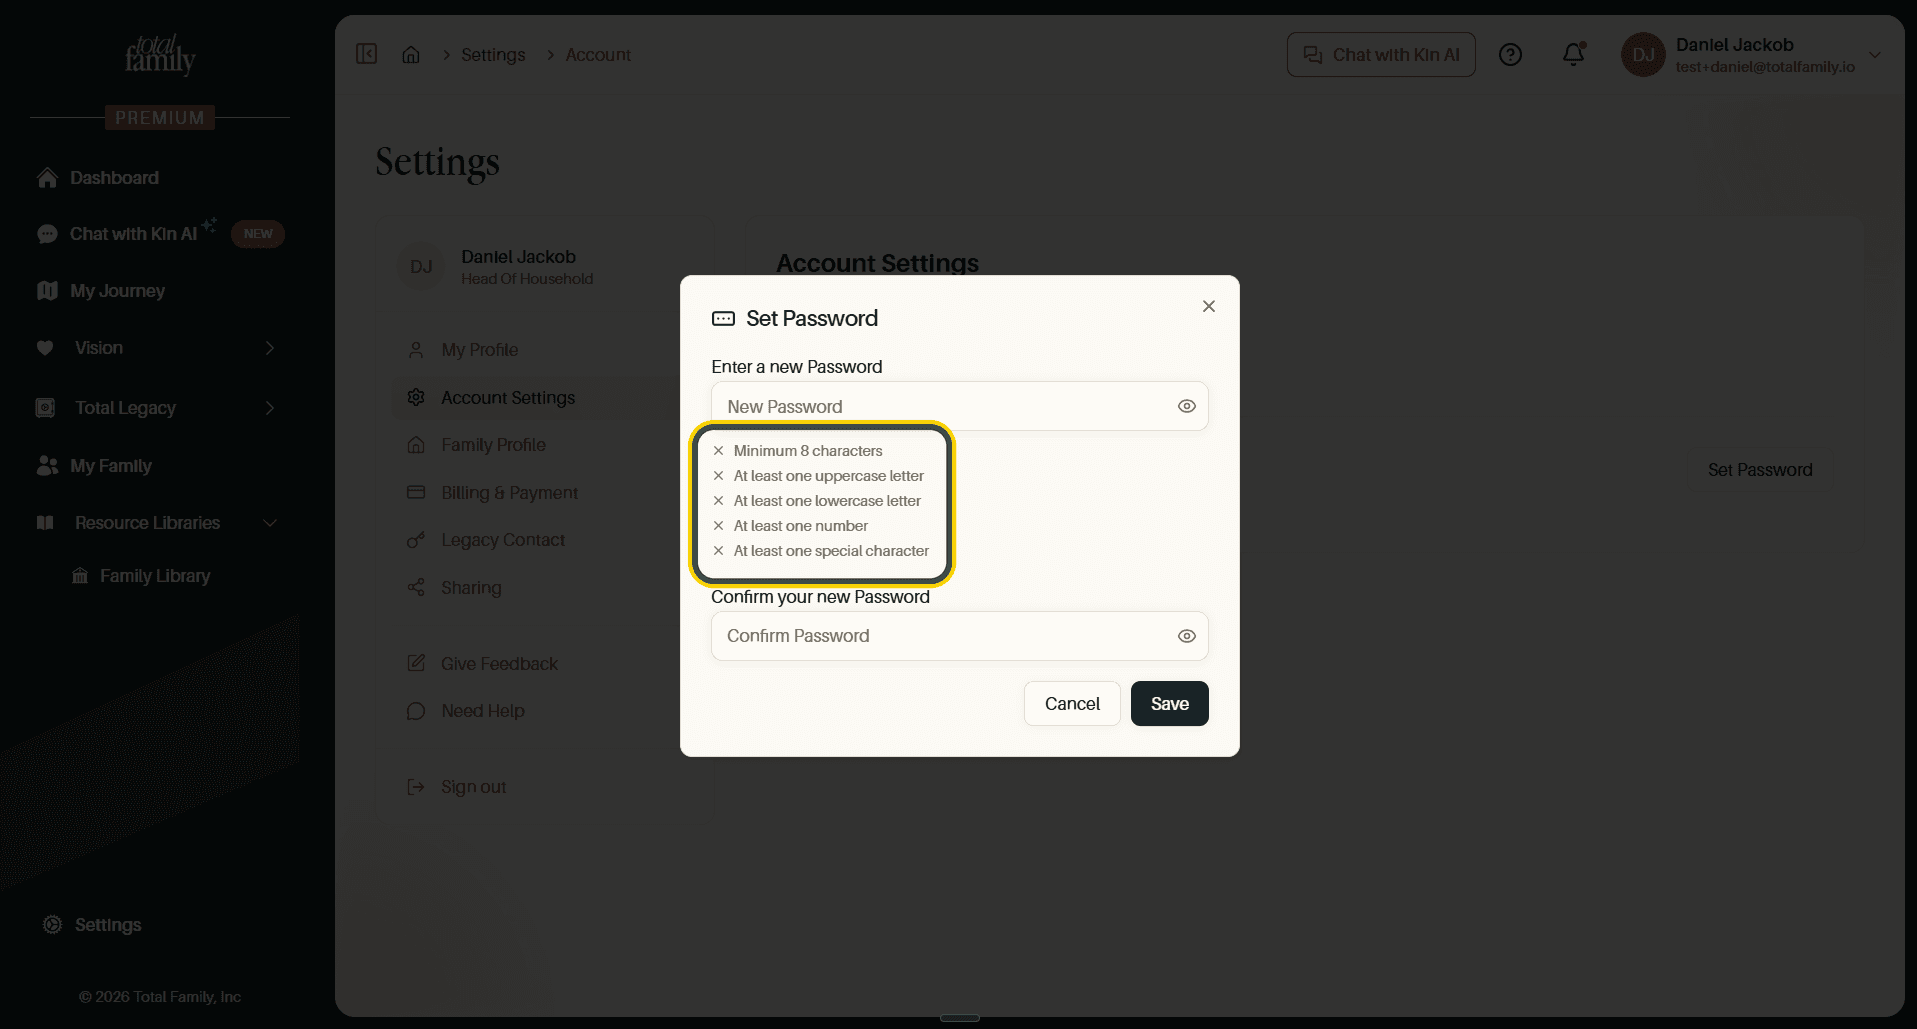
Minimum 8 characters · at least one uppercase letter · at least one lowercase letter · at least one number · at least one special character.
Confirm it in the second field and select Save.
Family Profile
Your household's details, as opposed to your own.
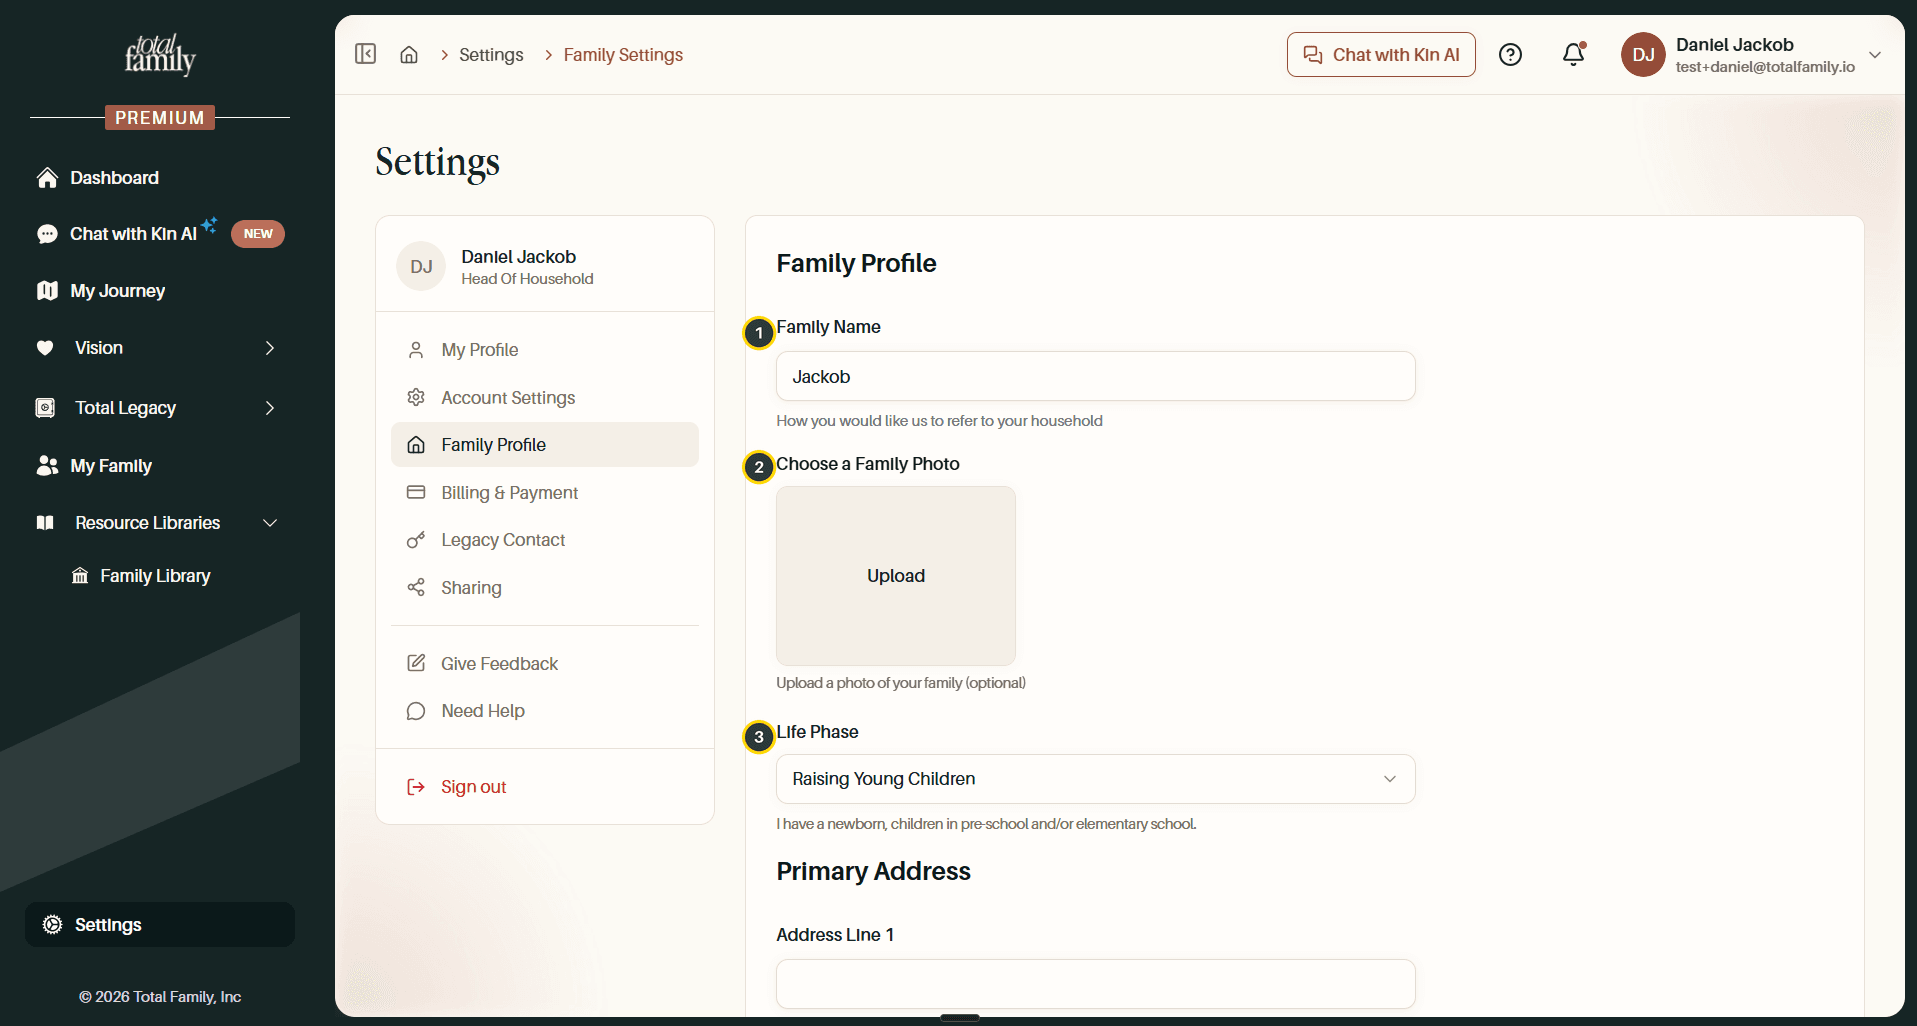
- Family Name: how Total Family refers to your household.
- Family Photo: optional, and used on your vision boards and dashboard.
- Life Phase: the stage your family is in, with a description underneath confirming what it covers.
Below that is your Primary Address: address lines, city, state, and zip.
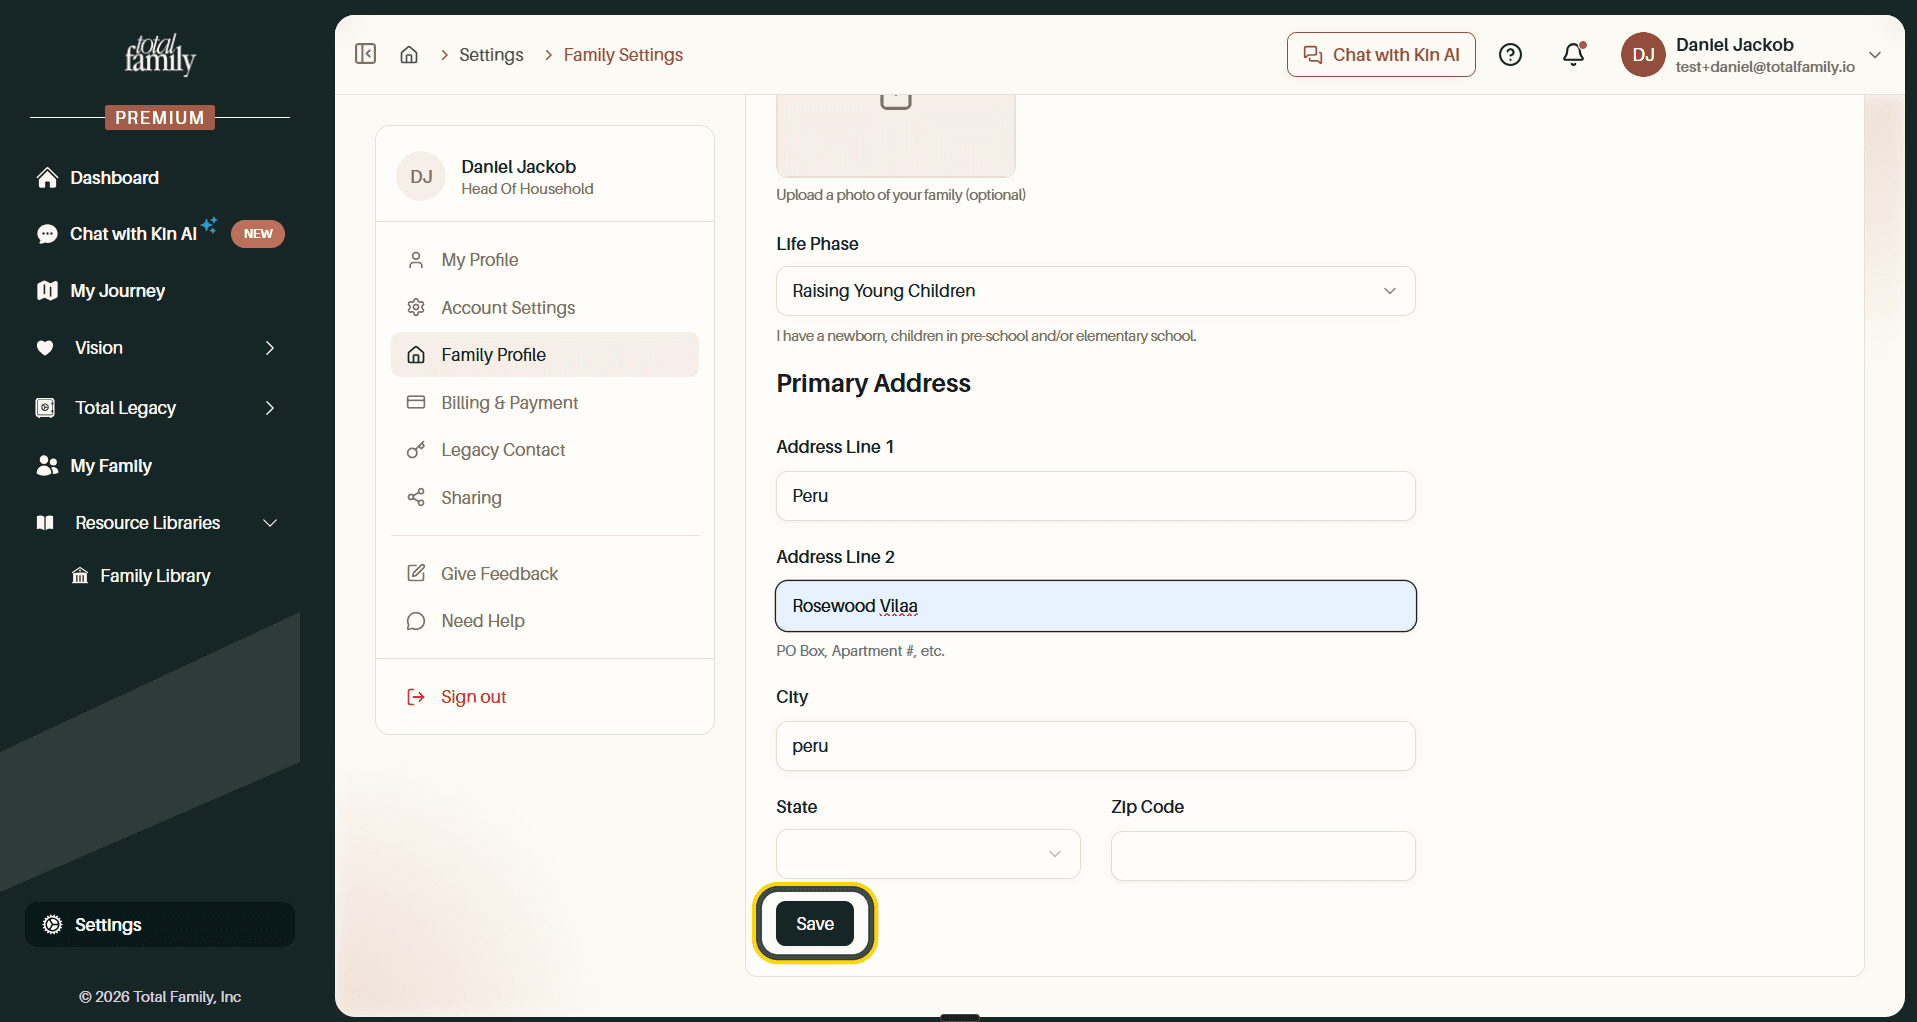
Select Save when you are done.
Billing & Payment
What you are on, what it costs, and when it renews.
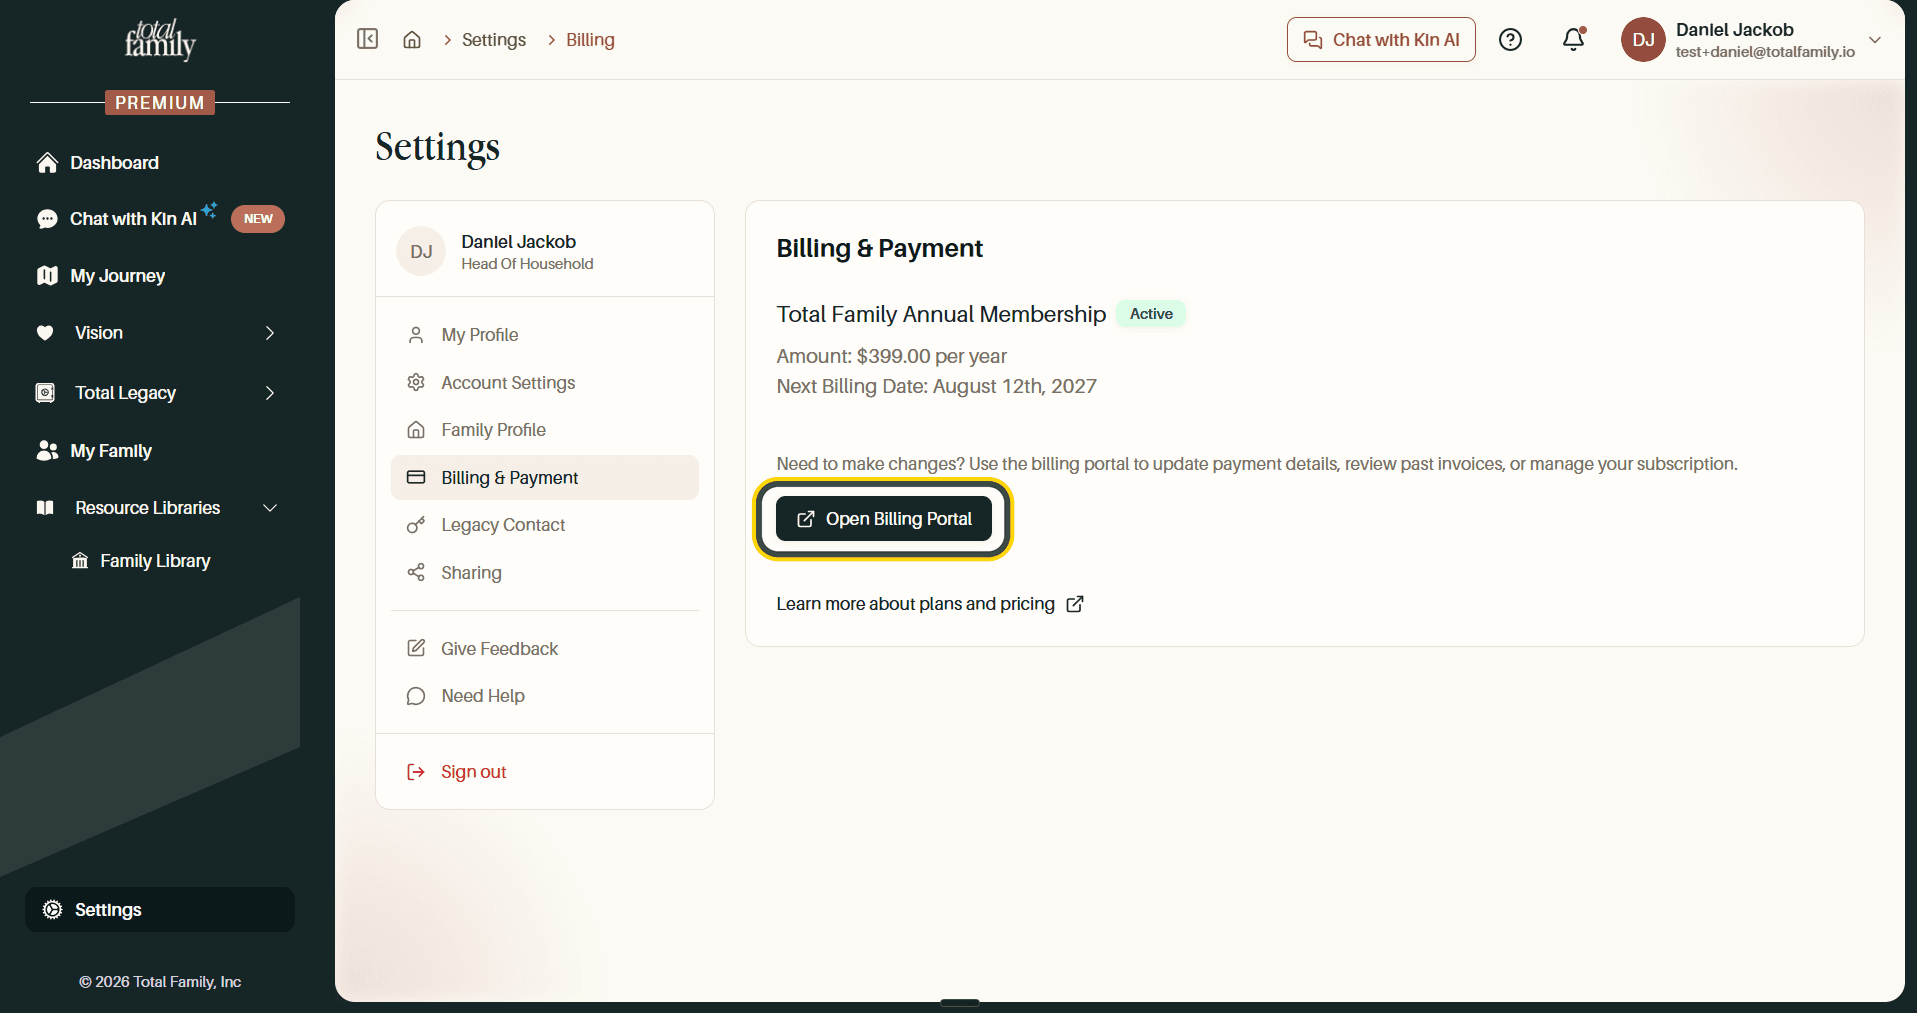
The panel shows your plan with an Active badge, the amount, and your next billing date. Open Billing Portal is where you actually make changes: update your card, review past invoices, or manage the subscription.
Legacy Contact
Choose what happens to your account after you die.
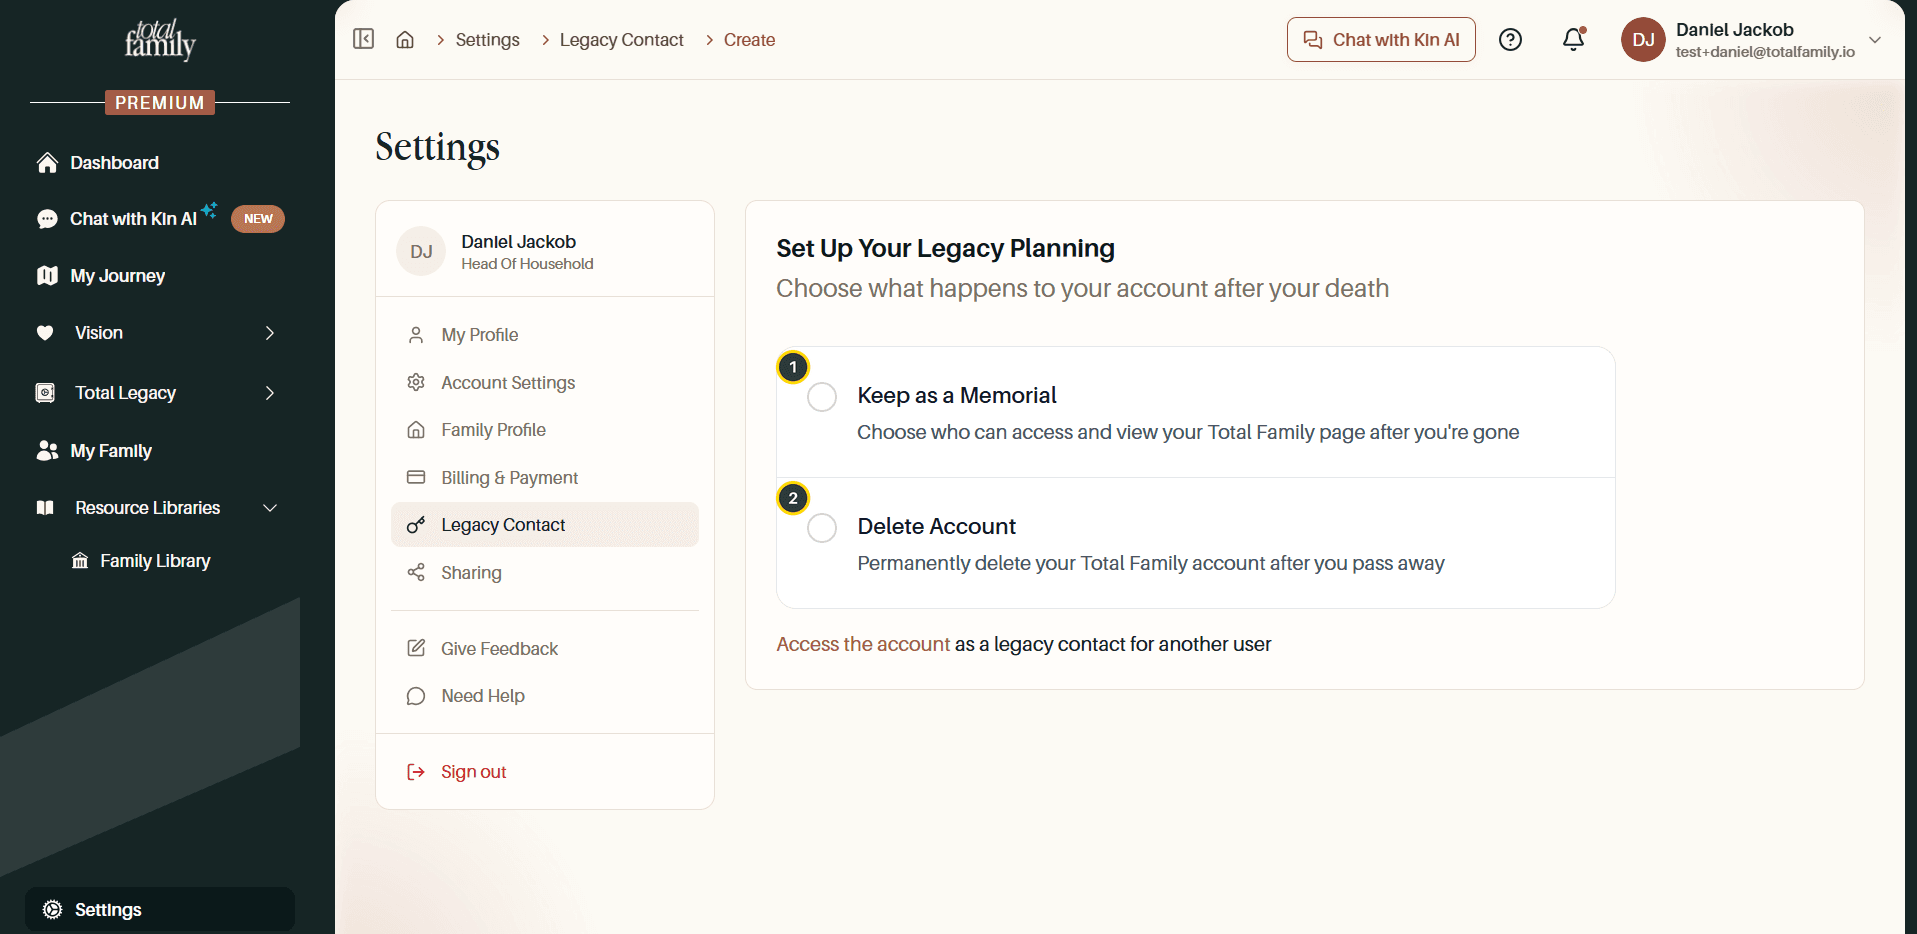
- Keep as a Memorial: preserve the account and choose who can access it.
- Delete Account: permanently delete it after you pass away.
The link underneath, Access the account as a Legacy Contact for another user, is for when someone else has named you as their Legacy Contact.
This is the one section with more to it than a single screen. Assigning contacts, setting permissions, and sharing access keys are all covered in Legacy Contact.
Sharing
Invite someone outside your family and give them read-only access to chosen assets. See Guest Sharing for the full walkthrough.
Give Feedback
Tell us what is working and what is not. Select Give Feedback and pick a Feedback Type to begin.
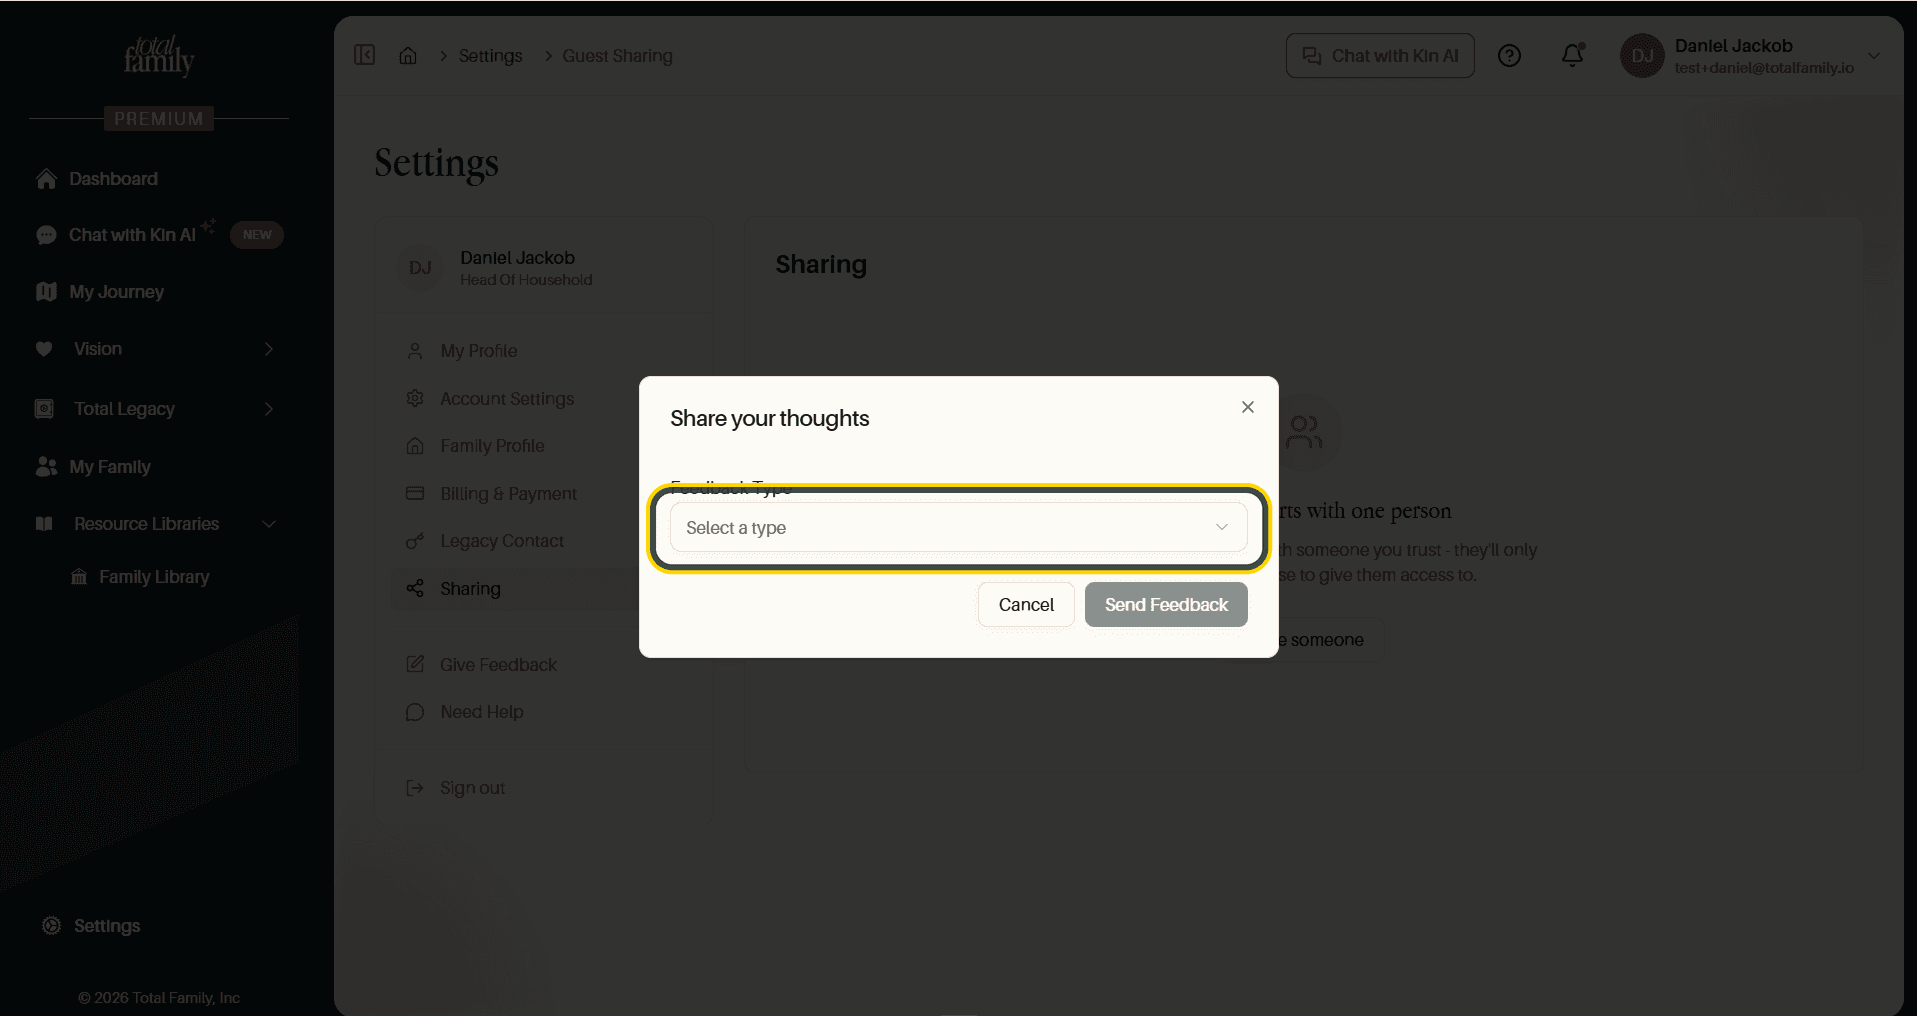
Choosing a type opens the rest of the form.
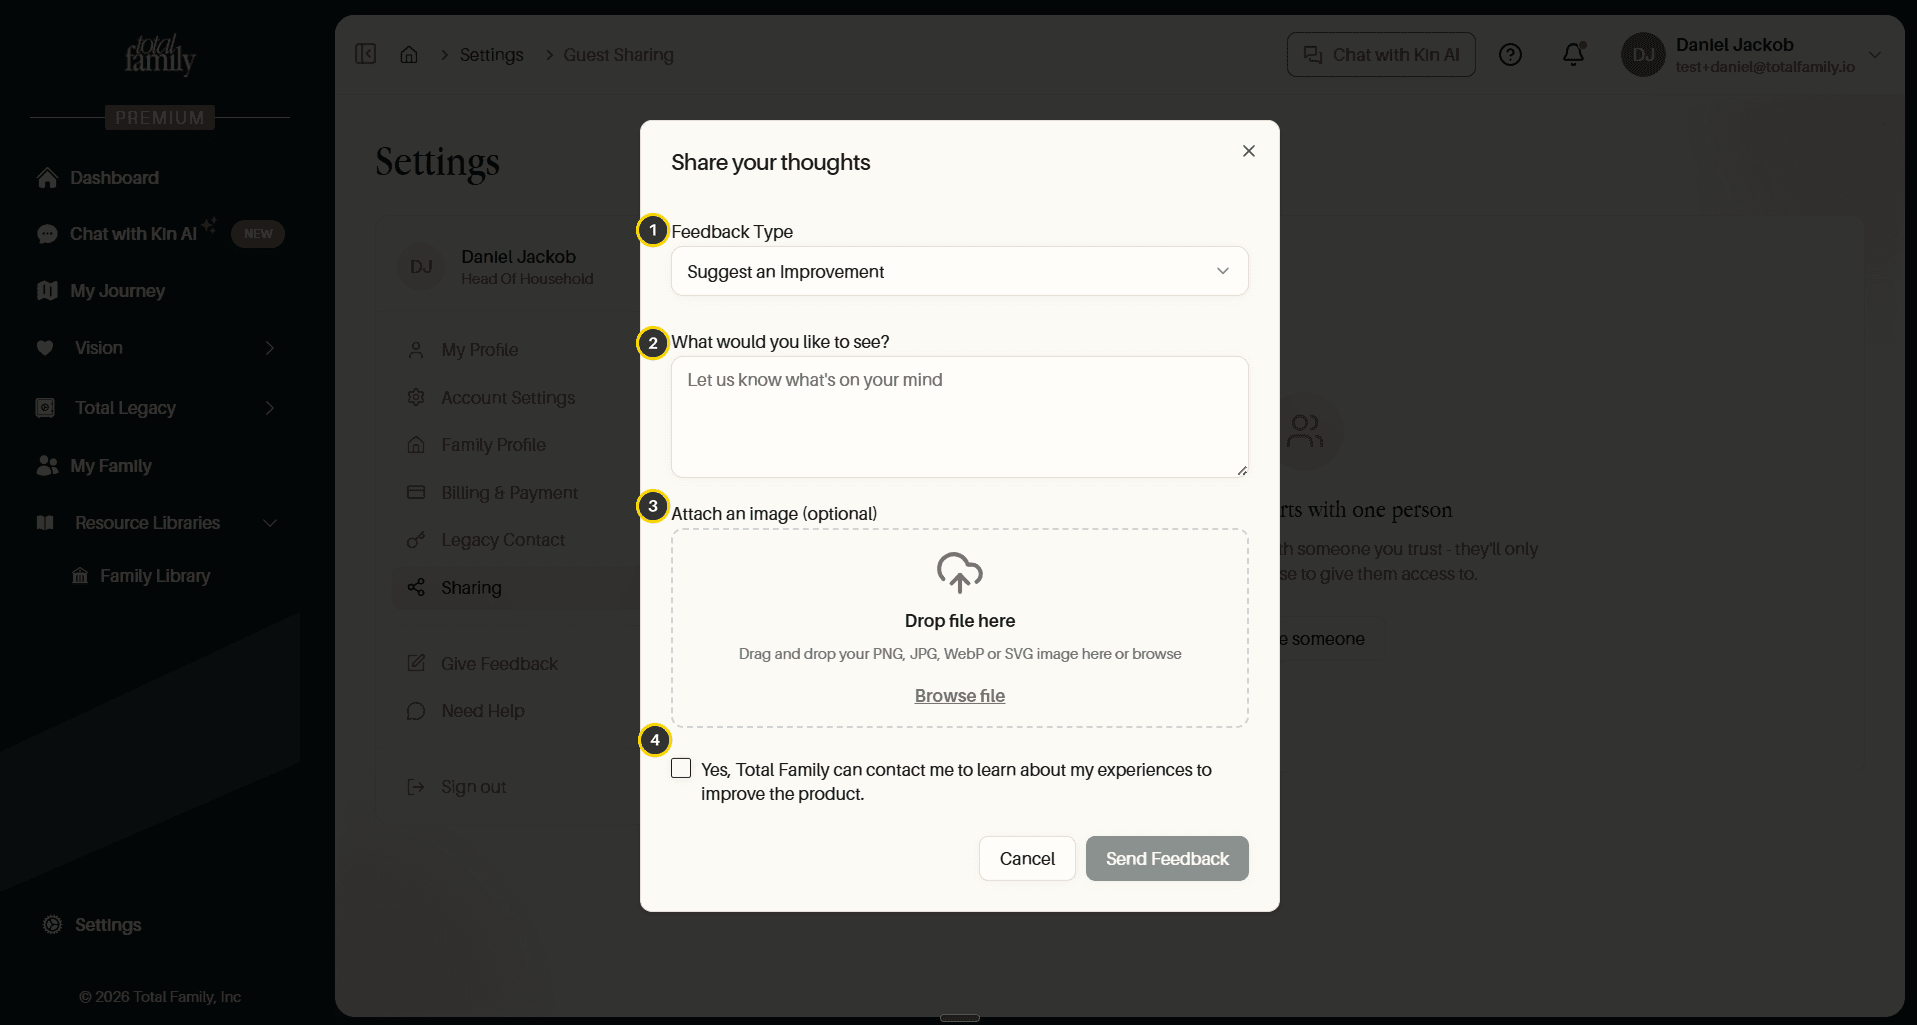
- Feedback Type: what kind of feedback this is, for example Suggest an Improvement.
- What would you like to see?: the feedback itself.
- Attach an image: optional. PNG, JPG, WebP, or SVG, dragged in or browsed for.
- Contact permission: tick this if you are happy for us to follow up and learn more.
Then select Send Feedback.
Need Help
For anything that needs a person rather than a suggestion box. Write what is going on and select Send Message. We reply as soon as we can.
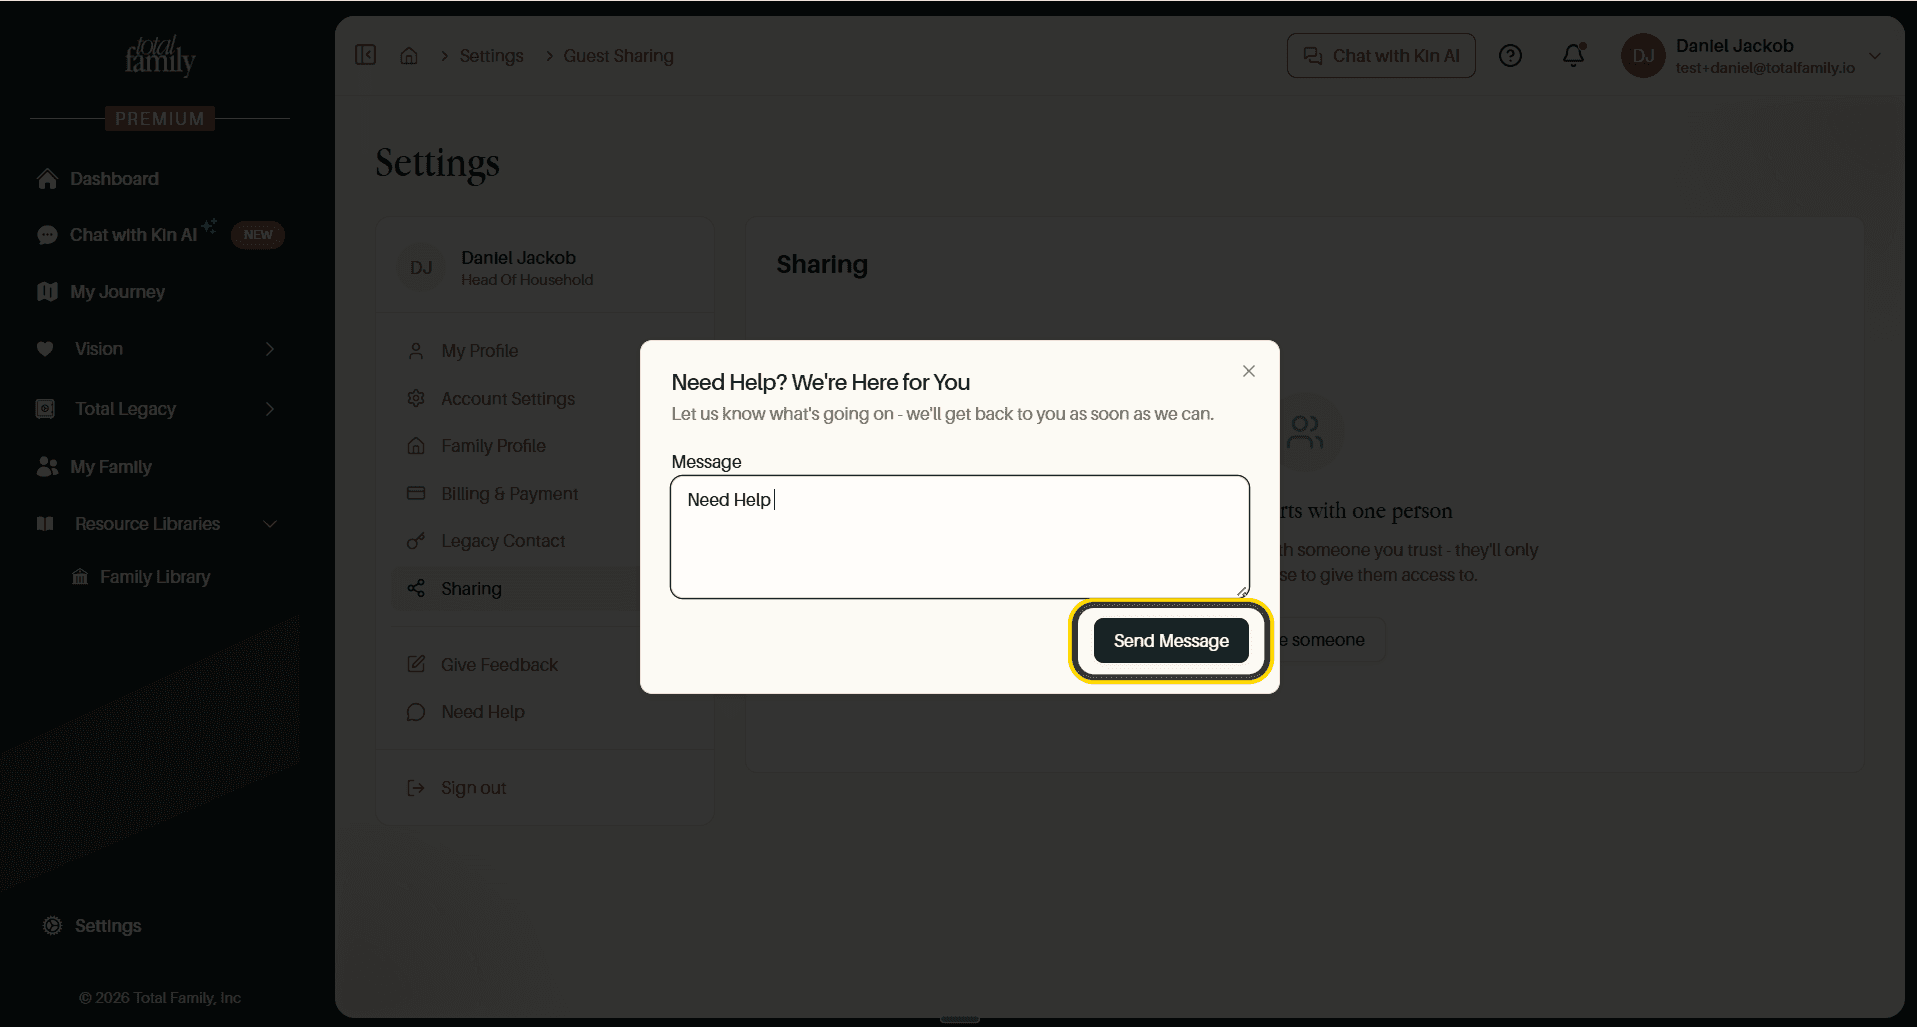
This is also the route for changing your email address, since that field is read-only on your profile.
Sign Out
Sign out sits at the bottom of the settings list, below a divider and marked in red so it is hard to hit by accident.